TL;DR: Quick Summary
- Takeaway 1: Follow each step carefully to successfully complete How to do an RV energy audit step by step.
- Takeaway 2: Gather all tools and materials before starting.
- Takeaway 3: Test your work after each major step to catch issues early.
Introduction
A single RV refrigerator cycling at 5 A on a 12 V system for 16 hours a day consumes 80 Ah—already more than half the usable capacity of a typical 100 Ah lithium battery. Miss that one number, and your entire solar-and-battery design starts on the wrong foot. That is exactly why an RV energy audit exists: to replace guesswork with measured, device-by-device data so you can size batteries, solar panels, and charge controllers with confidence.
An RV energy audit is a systematic process of inventorying every electrical load in your rig, measuring its actual current draw, estimating daily usage hours, and multiplying those figures into a total daily energy budget expressed in watt-hours (Wh) or amp-hours (Ah). The result is a single number—your daily consumption—that drives every downstream purchasing decision for boondocking power.
This guide walks through the complete process in concrete steps, with data tables, formulas, and a fully worked example you can replicate on your own RV. The audit is the non-negotiable first step before buying a single panel or battery.
Step-by-Step
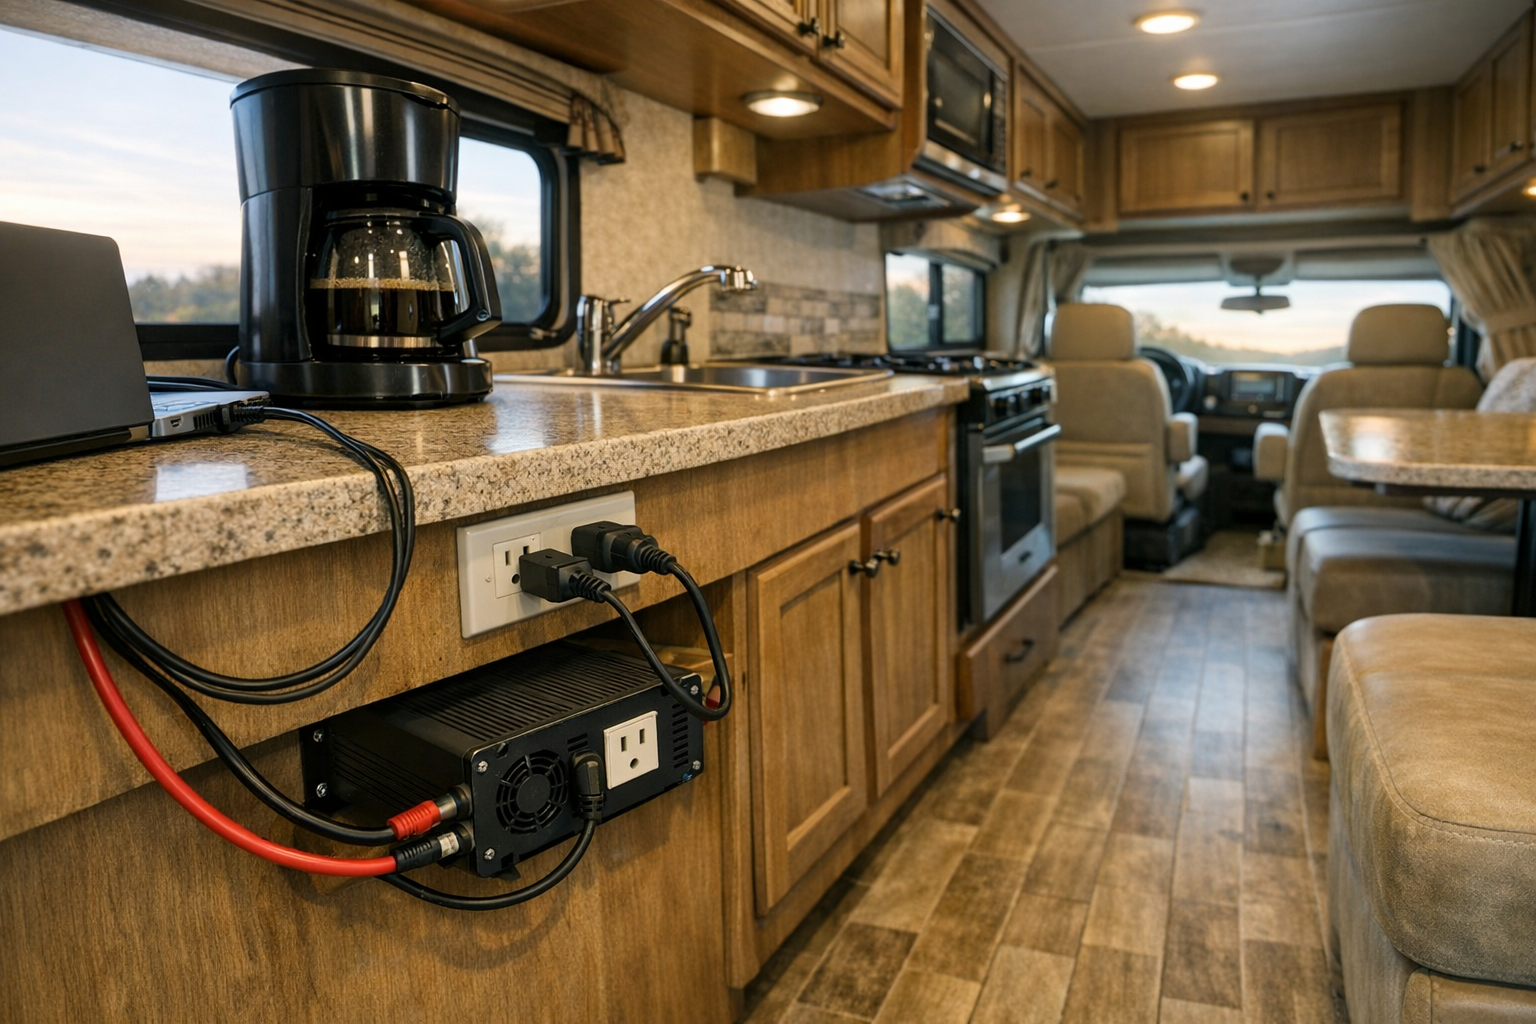
- Inventory every electrical device in your RV. Walk through the entire rig—cabinets, ceiling, basement bays—and list every device that uses electricity. Include items people commonly forget: vent fan controllers, slide-out motors, tank heaters, USB outlets with indicator LEDs, and the inverter itself. Separate the list into two columns: DC loads (powered directly from the 12 V system) and AC loads (powered through the inverter at 120 V). This distinction matters because AC loads carry an additional inverter-efficiency penalty that must be factored into your DC amp-hour budget. RV inverter sizing guide
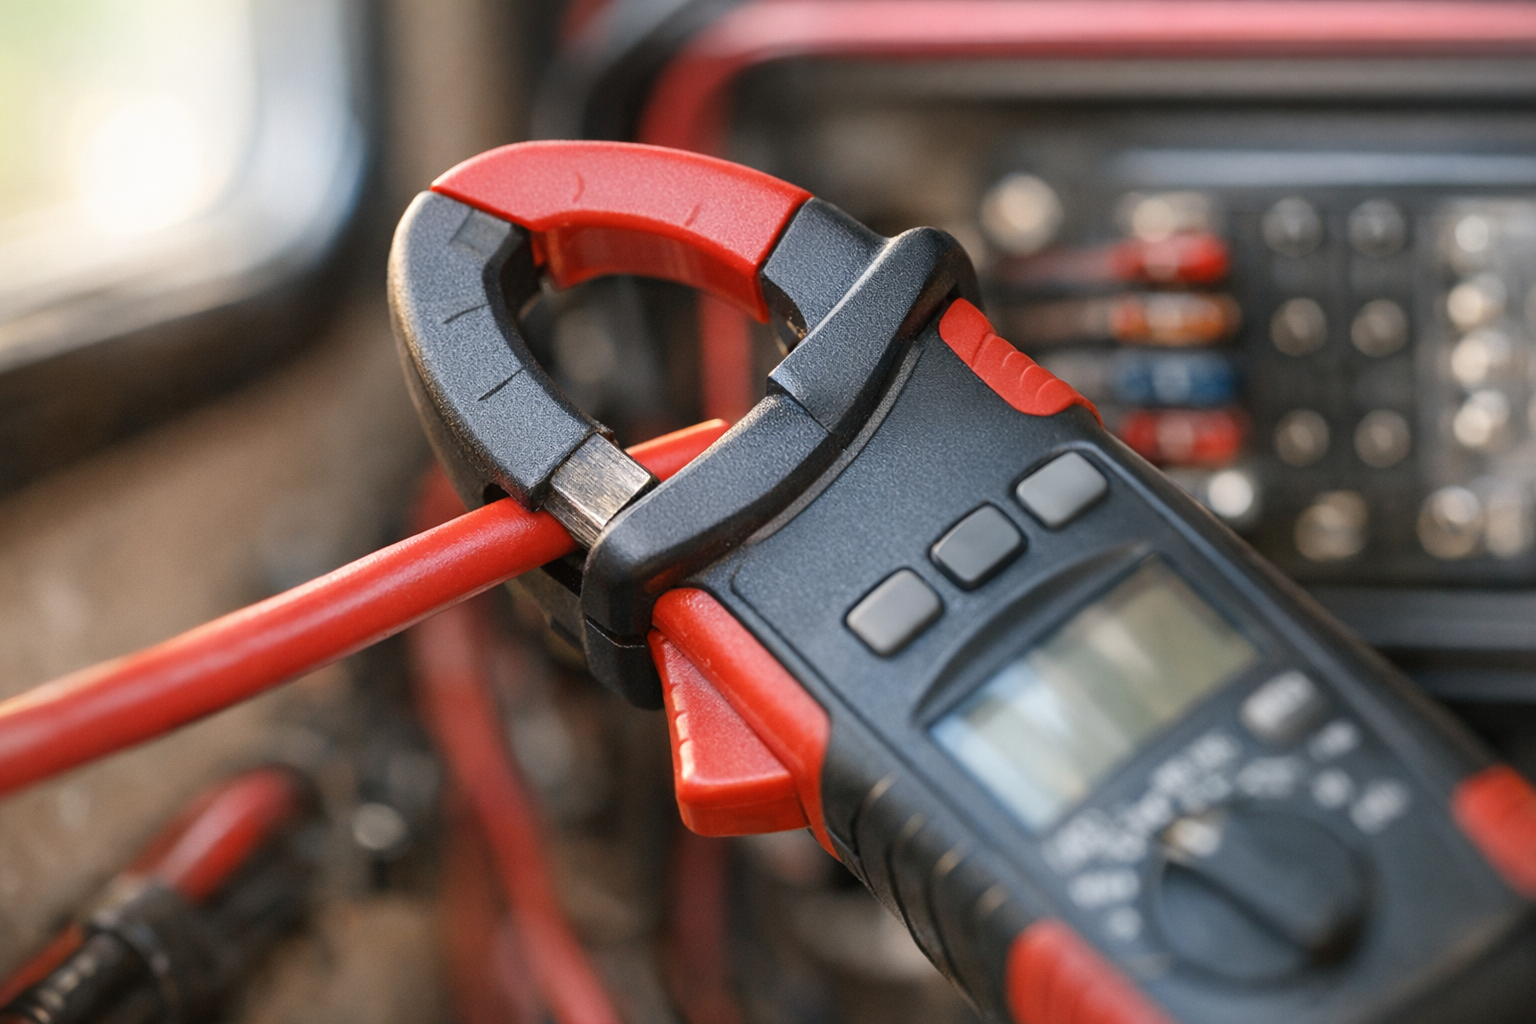
- Disconnect shore power and isolate circuits to measure baseline parasitic draw. Unplug from shore power, turn off the inverter, and switch off every device and light you can. Then read the current draw on your shunt-based battery monitor or clamp the negative battery cable with a DC clamp meter. The reading you see—typically 0.25–0.42 A (3–5 W)—is your parasitic draw. Record it. This load runs 24 hours a day, so multiply by 24 to get its daily Ah contribution. If the number exceeds 0.5 A, start pulling fuses one at a time to identify the offending circuit.
-
Record wattage and amperage for each device at minimum, typical, and maximum draw. Turn on one device at a time and note the current reading on your battery monitor or clamp meter. For devices with variable output—dimmable lights, multi-speed fans, refrigerators that cycle—record three values: minimum, typical, and maximum. Use the typical value for your daily calculation, but keep the maximum on file for surge and inverter sizing. For AC appliances, plug them into a Kill-A-Watt meter to read actual watts, then convert to DC amps:
DC Amps = AC Watts ÷ (12 V × Inverter Efficiency)
Example: 60 W laptop charger ÷ (12 × 0.85) = 5.88 A at the battery - Estimate daily usage hours for each device. Be honest and specific. A ceiling light you use for two hours after sunset is not the same as a porch light you leave on for eight hours. For cycling loads like refrigerators and furnace fans, estimate the effective run time. A compressor fridge with a 40 % duty cycle that is powered on for 24 hours has an effective run time of 24 × 0.40 = 9.6 hours. Record usage hours in a new column of your spreadsheet.
-
Calculate daily amp-hours for each device. Multiply each device’s typical DC amperage by its daily usage hours:
Daily Ah per device = DC Amps × Hours per day
Sum the column to get your raw daily consumption in amp-hours.
- Add inverter inefficiency losses and a safety buffer. If you already converted AC loads to DC amps using the inverter-efficiency formula in Step 3, those losses are baked in. Add a 10–15 % safety buffer to the grand total to account for battery aging, temperature effects on capacity, and unplanned usage spikes. Multiply your raw total by 1.10 or 1.15 to arrive at your design daily consumption.
-
Size your battery bank from the audit results. Your battery bank must store at least one full day’s design consumption within its usable depth of discharge (DoD). For lithium (LiFePO4) batteries at 80 % DoD:
Minimum Battery Ah = Design Daily Ah ÷ 0.80
For lead-acid or AGM batteries at 50 % DoD
Minimum Battery Ah = Design Daily Ah ÷ 0.50If you want two days of autonomy (no sun), double the daily figure before dividing by DoD.
-
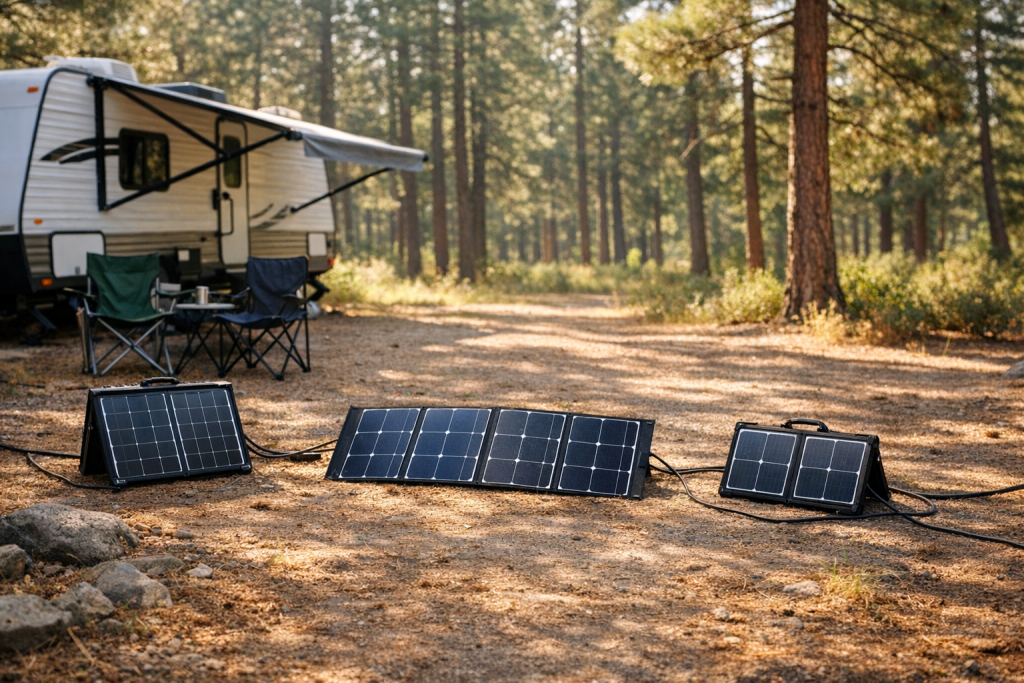
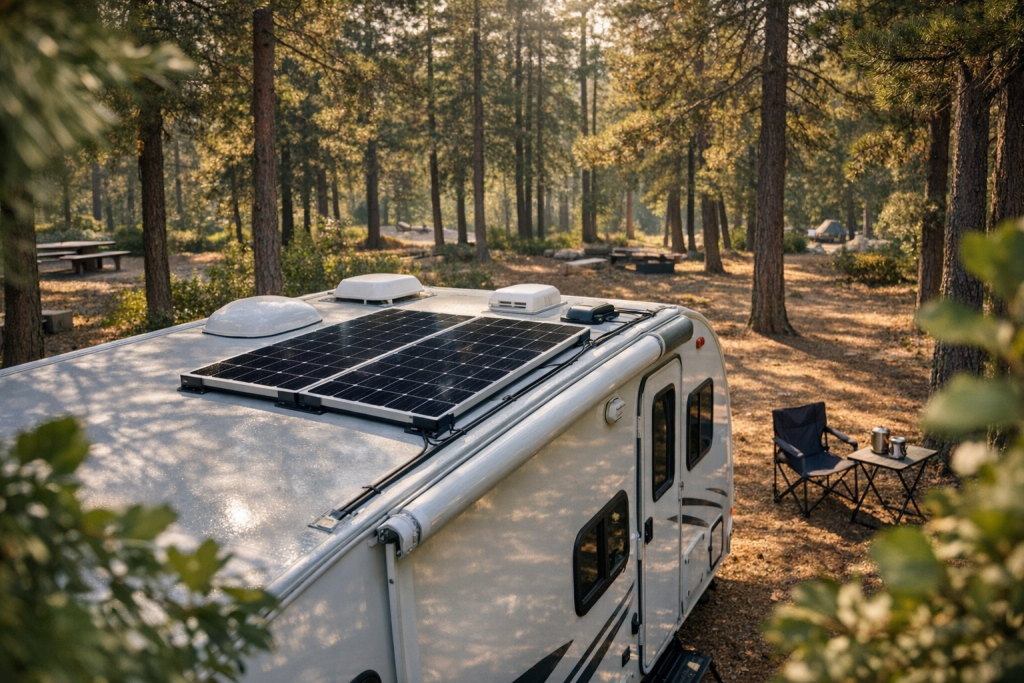
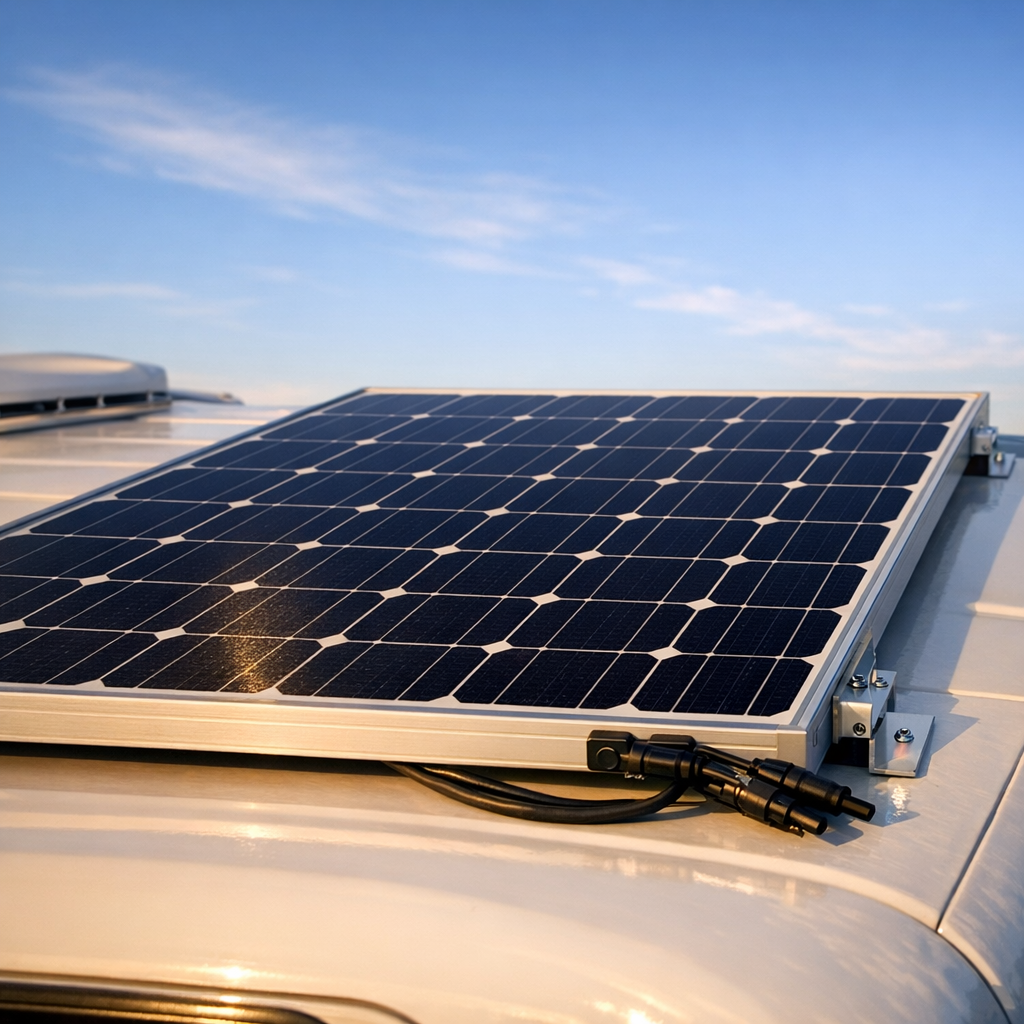
Size your solar array and charge controller. Convert your design daily Ah back to watt-hours (Ah × 12 V = Wh), then divide by the average peak sun hours for your typical camping region:
Minimum Solar Watts = Daily Wh ÷ Peak Sun Hours
Apply a 20–25 % derating factor for real-world panel losses (heat, angle, partial shading) to get a practical panel wattage target. Choose an MPPT charge controller guide rated for the resulting array current and voltage. MPPT charge controller guide
- Validate with a 24-hour real-world test. Spend one full day boondocking with your battery monitor logging cumulative Ah consumed. Compare the monitor’s 24-hour reading to your spreadsheet total. If they differ by more than 10 %, revisit your usage-hour estimates or re-measure suspect devices. This validation step catches errors before you spend money on hardware.
- Document and revisit annually. Save your spreadsheet and the date of the audit. Revisit it whenever you add or remove a device. Even without changes, re-audit once a year; battery capacity degrades over time, and your travel habits shift with the seasons.
Quick Reference
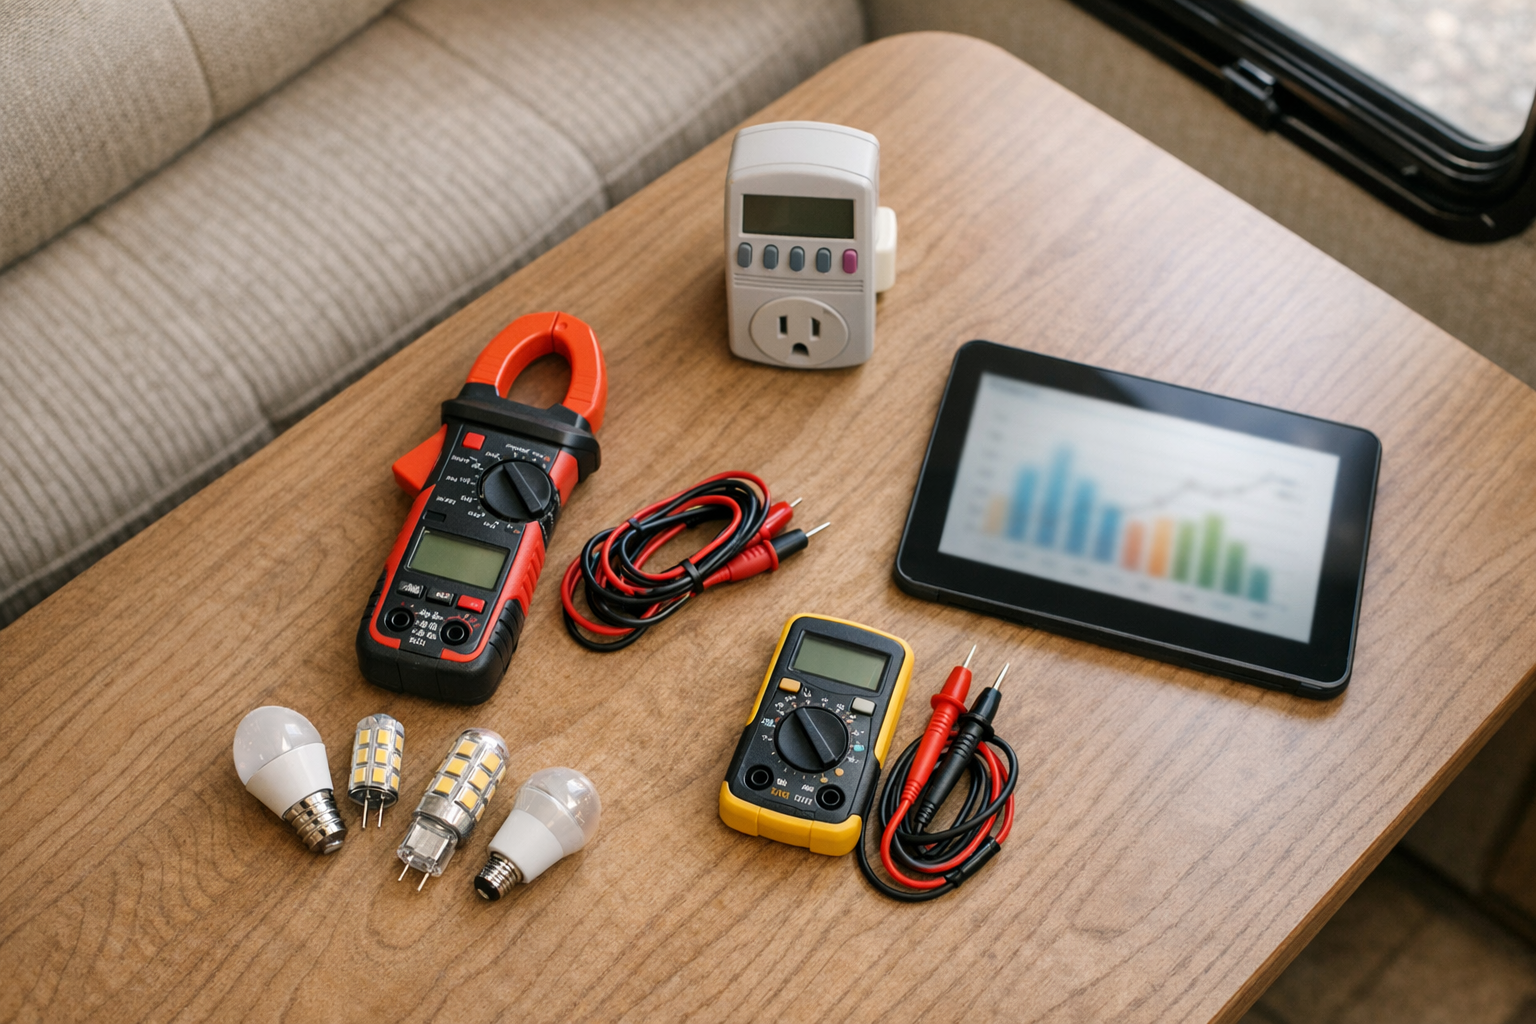
Tools You Need for an Accurate RV Energy Audit
You do not need a professional electrician or expensive lab equipment. A handful of affordable tools will give you measurement accuracy within a few percent—more than sufficient for system sizing.
Battery Monitors, Shunts, and Clamp Meters Explained
A shunt-based battery monitor (such as the Victron SmartShunt or Renogy 500A shunt) installs in series with your battery bank’s negative cable. It measures every milliamp flowing in or out and reports real-time current, cumulative Ah consumed, and state of charge. This is the gold standard for an RV energy audit because it captures data continuously, including overnight parasitic draw you might otherwise miss.
A DC clamp meter clips around a single wire without breaking the circuit. It is ideal for spot-checking individual circuits at the fuse panel. Look for a meter with a DC amp range of at least 0–40 A and a resolution of 0.01 A for small loads.
A Kill-A-Watt meter or similar AC power meter plugs inline between an AC outlet and an appliance. It reads watts, amps, and cumulative kWh for any 120 V AC device you plan to run through your inverter.
Free Spreadsheet and Calculator Options
A simple spreadsheet with columns for device name, watts, amps at 12 V, daily hours, and daily Ah is all you need. You can build one in Google Sheets in five minutes, or search for “RV power consumption calculator” templates that auto-sum totals and apply inverter-loss multipliers. The worked example later provides a ready-to-copy table format.
Key Data & Reference Table
| Parameter | Typical Value / Range | Notes |
|---|---|---|
| Parasitic (always-on) draw | 3–5 W (0.25–0.42 A at 12 V) | CO detector, LP alarm, control boards, stereo memory |
| LED light (single fixture) | 2–10 W | Measure at dimmest, mid, and full brightness |
| 12 V compressor fridge | 3–6 A running; duty cycle 30–60 % | Effective draw depends on ambient temp and door openings |
| Residential fridge (AC) | 100–180 W running | Must add inverter loss (10–15 %) when converting to DC Ah |
| Water pump | 4–8 A at 12 V | Intermittent; estimate 10–20 min/day for moderate use |
| Furnace fan | 6–11 A at 12 V | High draw; major winter load. Cycles on/off with thermostat |
| Laptop charger | 45–90 W (AC) | Use Kill-A-Watt to measure actual draw, not charger label |
| Cell booster / router | 10–25 W | Often on 24/7; significant cumulative load |
| Inverter idle (no-load) draw | 10–25 W | Counts as parasitic if inverter stays on continuously |
| Inverter efficiency | 80–92 % (load-dependent) | Use 85 % as a conservative planning figure |
| Usable battery capacity (lithium) | 80–100 % of rated Ah | LiFePO4 can safely discharge to 80–100 % DoD |
| Usable battery capacity (lead-acid) | 50 % of rated Ah | Discharging below 50 % dramatically shortens cycle life |
| Peak sun hours (US average) | 4–6 hours/day | Varies by season and latitude; use conservative local value |
| Safety buffer on daily total | 10–15 % | Accounts for aging, temperature, and unexpected loads |
Worked Example
Below is a concrete RV energy audit for a moderately equipped Class C motorhome used for weekend boondocking in the American Southwest (5 peak sun hours). The owner has a 12 V compressor fridge, LED lighting, a water pump, a cell booster, a laptop, and a small coffee maker run through a 2,000 W inverter.
Device Inventory and Measurements
| Device | Type | Measured Draw | DC Amps (at 12 V) | Hours/Day | Daily Ah |
|---|---|---|---|---|---|
| Parasitic (CO detector, LP alarm, control boards) | DC | 4 W | 0.33 A | 24 | 8.0 |
| LED ceiling lights (4 fixtures) | DC | 24 W total | 2.00 A | 4 | 8.0 |
| 12 V compressor fridge | DC | 5 A running, 40 % duty | 5.00 A (eff. 2.00 A avg) | 24 | 48.0 |
| Water pump | DC | 6 A | 6.00 A | 0.25 | 1.5 |
| Vent fan (medium speed) | DC | 2.5 A | 2.50 A | 6 | 15.0 |
| Cell booster + Wi-Fi router | DC | 18 W | 1.50 A | 16 | 24.0 |
| Phone charging (×2) | DC (USB) | 10 W each | 1.67 A total | 3 | 5.0 |
| Laptop charger (AC via inverter) | AC | 60 W measured | 5.88 A * | 4 | 23.5 |
| Coffee maker (AC via inverter) | AC | 900 W measured | 88.24 A * | 0.1 (6 min) | 8.8 |
| Inverter idle draw (when on for AC loads) | DC | 15 W | 1.25 A | 5 | 6.3 |
| Raw Daily Total | 148.1 Ah | ||||
* AC-to-DC conversion uses 85 % inverter efficiency: DC Amps = AC Watts ÷ (12 × 0.85).
Applying the Safety Buffer
Battery Bank Sizing
The owner plans to use LiFePO4 batteries with 80 % usable DoD and wants one day of autonomy
A single 200 Ah lithium battery is close but leaves no margin. Two 100 Ah batteries (200 Ah total) would technically fall short. The practical choice is either one 300 Ah battery or two 200 Ah batteries wired in parallel (400 Ah), which also provides a comfortable two-day autonomy window for cloudy stretches.
Solar Array Sizing
Minimum Solar Watts = 2,043.6 Wh ÷ 5 peak sun hours = 408.7 W
Derated (×1.25 for real-world losses) = 510.9 W
Rounding up, the owner should target approximately 500–600 W of rooftop solar. A pair of 300 W panels (600 W total) paired with a properly rated MPPT charge controller guide would comfortably replenish the daily budget under average Southwest sun conditions. MPPT charge controller guide
Interpreting the Results
The compressor fridge alone accounts for 48 Ah—nearly a third of the raw total. The six-minute coffee maker, despite running briefly, pulls almost 9 Ah because of its extreme wattage through the inverter. These insights are exactly what an energy audit reveals: the devices that dominate your budget are not always the ones you expect.
Common RV Energy Audit Mistakes to Avoid
| Mistake | Why It Matters | How to Fix It |
|---|---|---|
| Using nameplate ratings instead of measured draw | Nameplate watts are often maximum or surge values, not typical operating draw | Measure every device with a clamp meter or battery monitor |
| Forgetting parasitic loads | 3–5 W × 24 h = 6–10 Ah/day of invisible consumption | Always measure baseline draw with everything “off” |
| Ignoring inverter idle draw | 15 W idle × 10 h = 12.5 Ah/day wasted | Include inverter idle time in your spreadsheet; use an auto-on/off inverter or switch it off manually |
| Underestimating fridge duty cycle in hot weather | Duty cycle can jump from 30 % to 60 %+ in 100 °F ambient temps | Audit in the hottest conditions you expect to camp in, or use a worst-case 60 % duty cycle |
| Not accounting for inverter efficiency on AC loads | Adds 10–18 % to the DC cost of every AC device | Use the formula: DC Amps = AC Watts ÷ (12 × 0.85) |
| Skipping the 24-hour validation test | Paper estimates can differ 15–25 % from real-world use | Boondock for one full day and compare battery monitor Ah to your spreadsheet |
| Sizing batteries without a DoD factor | Discharging lead-acid below 50 % kills cycle life; even lithium should not be drained to 0 % routinely | Divide daily Ah by 0.50 (lead-acid) or 0.80 (lithium) to find minimum bank size |
Step 2 Deep Dive — Measuring Baseline Parasitic Draw
How to Disconnect Shore Power and Isolate Circuits
Unplug the shore power cord and confirm the inverter is off. Turn off every switch, light, and appliance. Close all cabinet doors (some fridges have door-ajar alarms). Now read the battery monitor.
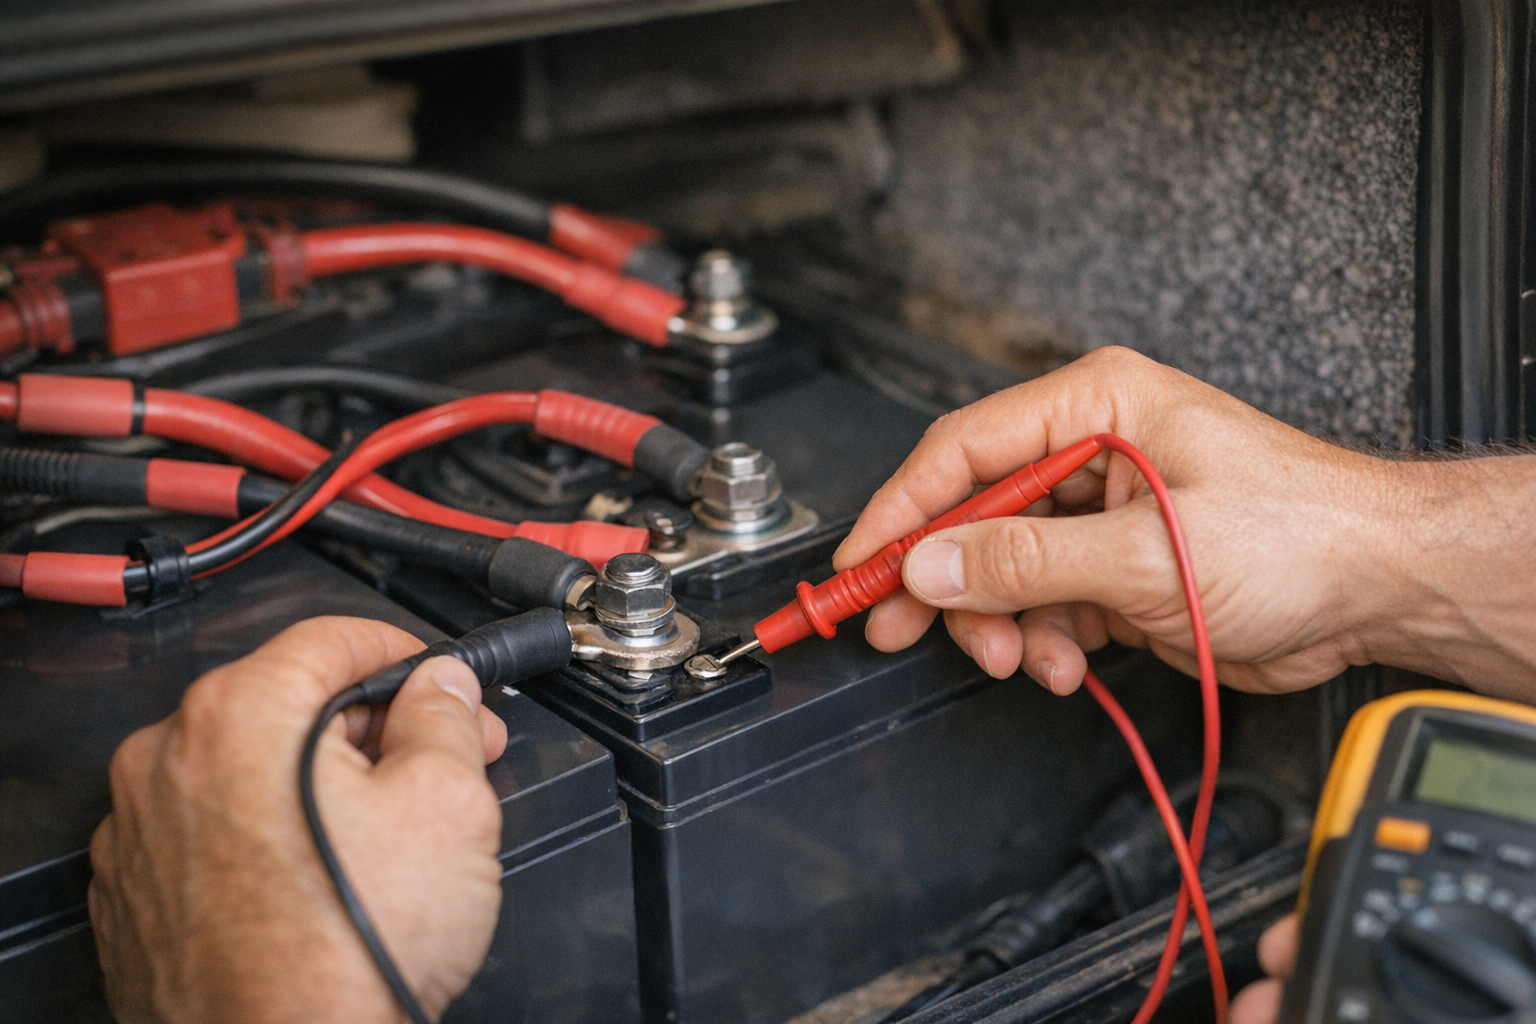
A healthy RV with no aftermarket accessories typically shows 0.25–0.42 A (3–5 W). If you see more than 0.5 A, begin pulling fuses at the DC distribution panel one at a time, noting which fuse drops the reading. Common culprits include aftermarket stereos with always-on memory circuits, powered antenna amplifiers, and slide-out controller boards.
Document each parasitic source and its individual draw. Some are non-negotiable safety devices (CO/LP detectors); others can be switched off or put on a timer to reduce overnight drain.
Step 3 Deep Dive — Recording Wattage and Amperage
Testing at Minimum, Typical, and Maximum Draw
Step 4 Deep Dive — Estimating Daily Usage Hours
Usage-hour estimates are the most subjective part of the audit, and they are where most errors creep in. Use these strategies to improve accuracy
- Time yourself for one day. Set a phone timer every time you turn a device on and off. Ultimately, sum the intervals.
- Use duty-cycle percentages for cycling loads. A fridge that runs 24/7 but cycles its compressor 40 % of the time has an effective run time of 9.6 hours. A furnace fan that cycles 50 % of the time over an 8-hour night has an effective run time of 4 hours.
- Separate weekday and weekend profiles if your usage differs. A remote worker running a laptop and monitor for 8 hours has a very different profile from a weekend camper who streams for 2 hours in the evening.
- Account for seasonal variation. Winter means more furnace fan hours and fewer vent fan hours. Summer means higher fridge duty cycles and more fan use. Build two audit scenarios—summer and winter—and size your system for the larger number.
Step 6 Deep Dive — Sizing Your Battery Bank from Audit Results
Step 7 Deep Dive — Sizing Your Solar Array and Charge Controller
Recommended Gear
- Victron SmartSolar MPPT 100/30 — View on Amazon
- Renogy 100W Monocrystalline Panel — View on Amazon
- Battle Born 100Ah LiFePO4 Battery — View on Amazon
FAQs
- Can I do my own RV energy audit without professional help? Yes. An inexpensive DC clamp meter (under $40) or a shunt-based battery monitor and a simple spreadsheet are all you need. No electrician is required for the measurement and calculation process. Professional help is only necessary if you discover wiring issues or plan to modify circuits.
- How long does an RV energy audit take? A thorough audit typically takes two to four hours to inventory every device, measure each one individually, and enter the data into a spreadsheet. The optional 24-hour validation test adds another day but requires minimal active effort—just normal camping while the battery monitor logs consumption.
- Do I need lithium-compatible settings? Ensure your controller supports LiFePO4 profiles and proper voltages.
- What gauge wire should I use for solar? Match wire gauge to amperage and run length; 10 AWG handles 30 A up to about 15 ft.
As an Amazon Associate, we earn from qualifying purchases. This helps keep SunAmpRV running.