
- Introduction
- Why Tilt Angle Matters for RV Solar Panels
- How to Calculate Your Optimal Tilt Angle by Latitude
- Key Data & Reference Table
- Seasonal Tilt Adjustments for Maximum RV Power
- Orienting Your RV Solar Panels Toward True South
- Best Tilt Mounting Options for RVs
- Step-by-Step
- Safety Considerations
- FAQs
TL;DR: Quick Summary
- Takeaway 1: Read the full guide before starting — each step builds on the one before it.
- Takeaway 2: Adapt every recommendation to your specific RV, equipment, and conditions rather than copying numbers directly.
- Takeaway 3: Verify your result against the checklist or reference points in this guide before calling it done.
Introduction
A 400 W RV solar panel mounted flat at 40°N latitude produces roughly 324 W of effective peak output — a 19% loss caused entirely by the mismatch between the panel surface and the sun’s angle of incidence. Tilt that same panel to 40° and aim it true south, and you reclaim nearly all of that lost energy. In winter, the gap widens dramatically: flat panels at northern latitudes can forfeit 25–40% of their potential harvest compared to panels tilted to the correct seasonal angle.
This guide is built around one core principle: the optimal year-round tilt angle for a solar panel equals the geographic latitude of your location. From that single rule, we derive seasonal adjustments, advanced declination-based formulas, and real-world power-gain calculations tailored to the RV lifestyle — where your latitude changes every time you move camp.
Below you will find a complete latitude-zone reference table covering the continental US and southern Canada, step-by-step instructions for dialing in your angle, a worked example comparing flat vs. tilted output across seasons, and practical guidance on mounting hardware.
Why Tilt Angle Matters for RV Solar Panels
How Flat-Mounted Panels Lose Up to 40% Efficiency
Solar cells generate maximum power when sunlight strikes the panel surface at a perpendicular 90° angle. Every degree of deviation reduces effective irradiance by the cosine of that deviation angle.
At 40°N latitude in December, the sun reaches a noon altitude of only about 26.5°. A flat panel (0° tilt) meets those rays at a 63.5° angle of incidence, and cos(63.5°) ≈ 0.45 — meaning the panel captures barely 45% of the available direct-beam energy. That is where the “up to 40% loss” figure originates, and in practice the loss can be worse on short winter days when every hour of sunlight counts.
The effect is less severe in summer. At the same 40°N latitude in June, solar noon altitude reaches roughly 73.5°, so a flat panel’s cosine loss is only about 4%. This is why RV owners who travel exclusively in summer often get away with flat-mounted panels. But for anyone who boondocks in fall, winter, or spring — or who camps at higher latitudes — tilt adjustment is the single highest-impact, lowest-cost upgrade available.
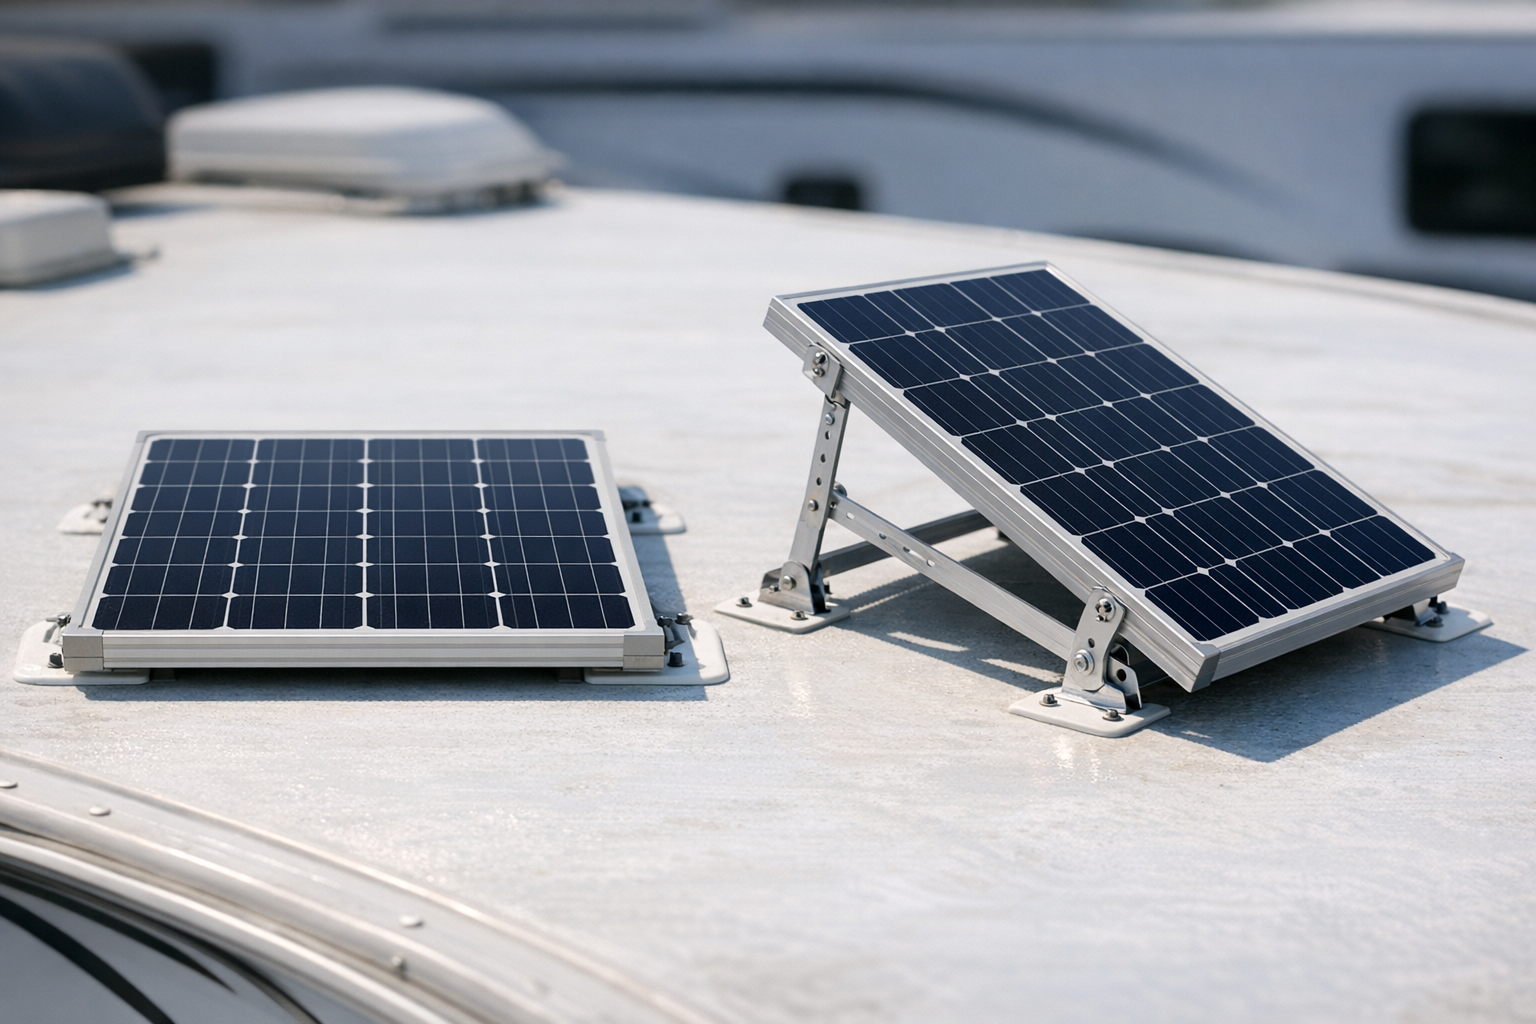
Fixed Rooftop vs. Adjustable Tilt Brackets
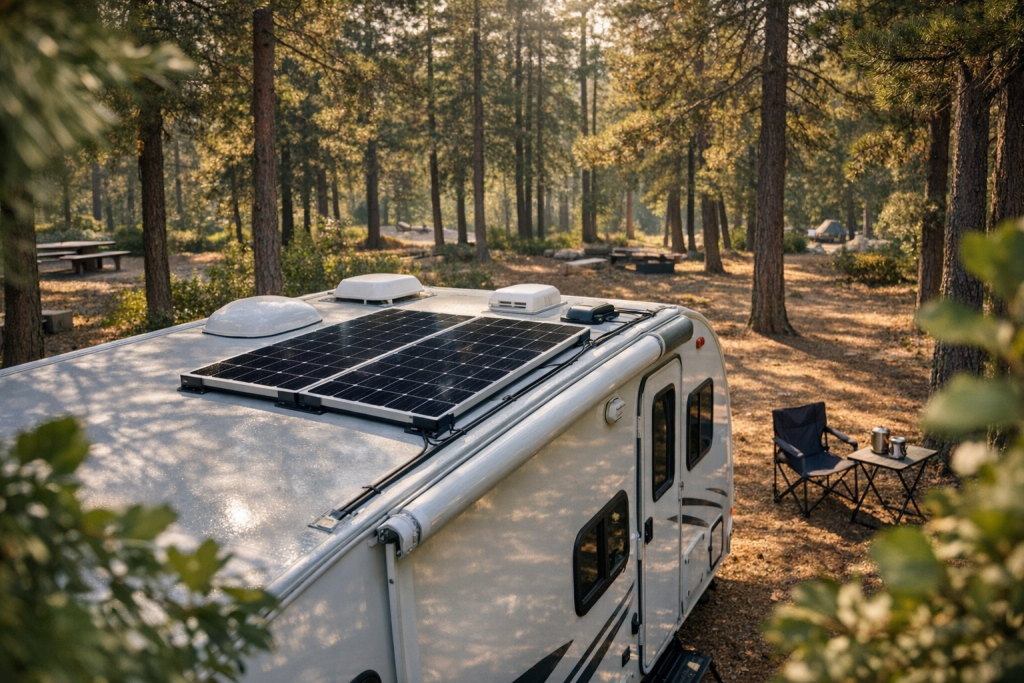
Most factory RV solar installations bolt panels flat to the roof for aerodynamic simplicity. This is a reasonable compromise for highway driving, but it is not optimized for energy production. Adjustable tilt brackets solve the problem by letting you raise the rear edge of each panel to the desired angle when parked.
| Feature | Fixed Flat Mount | Adjustable Tilt Bracket |
|---|---|---|
| Aerodynamic drag while driving | Minimal | Must be folded flat before travel |
| Year-round energy capture | 60–90% of optimal (latitude-dependent) | 95–100% of optimal when adjusted |
| Winter energy gain vs. flat | Baseline | +25–40% |
| Typical cost per panel | $15–$30 (Z-brackets) | $40–$120 (tilt kit) |
| Installation complexity | Low | Moderate — requires roof penetration or adhesive rail |
| Snow shedding | Poor — snow sits on flat surface | Good at ≥ 50° tilt |
For most RV owners who boondock across multiple seasons, adjustable tilt brackets pay for themselves within a single winter camping trip through the additional energy harvested.
How to Calculate Your Optimal Tilt Angle by Latitude
The Simple Rule — Tilt Angle = Your Latitude
The foundational formula is elegant in its simplicity
Example: Camping near Albuquerque, NM (35.1°N) → set tilt to 35°.
This single angle maximizes total annual energy by splitting the difference between the sun’s high summer arc and low winter arc. It is the best “set it and forget it” angle if you plan to stay in one latitude zone for an extended period.
Advanced Formula Using Solar Declination
For RV owners who want to fine-tune beyond the simple rule, the advanced seasonal formulas account for the Earth’s 23.5° axial tilt (solar declination)
Summer Tilt = (Latitude × 0.9) − 23.5°
Spring/Fall Tilt = Latitude − 2.5°
These formulas produce slightly different results than the simpler ±15° rule because they weight the solar declination curve more accurately. Here is a comparison at 40°N
| Season | Simple Formula | Advanced Formula | Difference |
|---|---|---|---|
| Summer | 25° | 12.5° | 12.5° — advanced is more aggressive |
| Year-round | 40° | 37.5° (spring/fall proxy) | 2.5° |
| Winter | 55° | 65° | 10° — advanced captures lower sun |
For most RV applications, the simple ±15° rule is accurate enough and far easier to implement with common tilt bracket detent positions. The advanced formula becomes worthwhile if you are stationary for an entire winter season and want to maximize every watt.
Key Data & Reference Table
The table below covers the primary latitude bands where RVers camp across the continental US and southern Canada. All angles are measured from horizontal (0° = flat, 90° = vertical).
| Latitude Zone | Example Locations | Year-Round Tilt | Summer Tilt (Lat − 15°) | Winter Tilt (Lat + 15°) | Advanced Winter (Lat × 0.9 + 29°) | Flat-Panel Loss vs. Optimal (Annual) |
|---|---|---|---|---|---|---|
| 25°N | Key West, FL; South Padre Island, TX | 25° | 10° | 40° | 51.5° | ~10% |
| 28°N | Tampa, FL; Corpus Christi, TX | 28° | 13° | 43° | 54.2° | ~12% |
| 30°N | Houston, TX; Jacksonville, FL | 30° | 15° | 45° | 56° | ~13% |
| 33°N | Phoenix, AZ; San Diego, CA | 33° | 18° | 48° | 58.7° | ~15% |
| 35°N | Albuquerque, NM; Asheville, NC | 35° | 20° | 50° | 60.5° | ~17% |
| 37°N | Richmond, VA; Fresno, CA | 37° | 22° | 52° | 62.3° | ~18% |
| 40°N | Denver, CO; Indianapolis, IN | 40° | 25° | 55° | 65° | ~19% |
| 42°N | Boston, MA; Boise, ID | 42° | 27° | 57° | 66.8° | ~22% |
| 45°N | Minneapolis, MN; Portland, OR | 45° | 30° | 60° | 69.5° | ~25% |
| 47°N | Seattle, WA; Glacier NP, MT | 47° | 32° | 62° | 71.3° | ~28% |
| 49°N | Vancouver, BC; Boundary Waters, MN | 49° | 34° | 64° | 73.1° | ~30% |
How to read this table: Find the latitude zone closest to your campsite. Use the “Year-Round Tilt” column for a single set-and-forget angle. If you adjust seasonally, use the summer or winter column. The final column shows how much energy you sacrifice annually by leaving panels flat versus tilting to the year-round optimum.
Seasonal Tilt Adjustments for Maximum RV Power
Summer Tilt (Latitude − 15°)
From roughly May through August, the sun tracks a high arc across the sky. Reducing your tilt angle by 15° from your latitude flattens the panel closer to horizontal, aligning it with the steep midday sun. At 40°N, a 25° summer tilt captures approximately 4–6% more energy than the year-round 40° setting during peak summer months. The gains are modest because the sun is already high, but every watt matters when running air conditioning or a residential refrigerator off-grid.
Winter Tilt (Latitude + 15°)
From November through February, the sun barely clears the southern horizon at northern latitudes. Adding 15° to your latitude steepens the panel to face the low sun more directly. This is where the biggest gains occur: at 40°N, switching from flat (0°) to a 55° winter tilt can boost daily harvest by 25–40%. Even switching from the year-round 40° setting to 55° yields a meaningful 8–12% winter improvement.
When to Switch Between Summer and Winter Settings
A practical two-adjustment schedule works well for most RV travelers
- Switch to summer tilt around the spring equinox (March 20–21) when the sun’s declination crosses 0° heading north.
- Switch to winter tilt around the fall equinox (September 22–23) when the sun’s declination crosses 0° heading south.
If you prefer a four-season approach, add adjustments at the solstices (June 21 and December 21) to fine-tune further. The two-adjustment method captures roughly 95% of the available seasonal gains with half the effort.
Orienting Your RV Solar Panels Toward True South
True South vs. Magnetic South — Finding the Difference
Tilt angle only delivers full benefit when the panel faces true south (in the Northern Hemisphere). True south is the direction toward the geographic South Pole, not the magnetic South Pole your compass needle points to. The difference between the two is called magnetic declination, and it varies significantly by location
| Location | Magnetic Declination | Compass Correction |
|---|---|---|
| Seattle, WA | ~15° East | Subtract 15° from compass reading |
| Denver, CO | ~8° East | Subtract 8° |
| Chicago, IL | ~3° West | Add 3° |
| Jacksonville, FL | ~6° West | Add 6° |
| Portland, ME | ~15° West | Add 15° |
Ignoring magnetic declination can point your panels 15° or more off true south, costing 3–5% of daily output. In the Pacific Northwest or New England — where declination is largest — the correction is essential.
Tools and Apps for Accurate Solar Orientation
The easiest field method is the solar noon shadow test: at solar noon (not clock noon), any vertical object casts a shadow pointing exactly true north. The opposite direction is true south. Solar noon times for your GPS coordinates are available in weather apps and solar calculator websites.
Smartphone compass apps with built-in declination correction (such as those using the World Magnetic Model) also work well. Enable “true north” mode in your phone’s compass settings, then rotate your RV or ground-mounted panel until the compass reads 180° (due south).
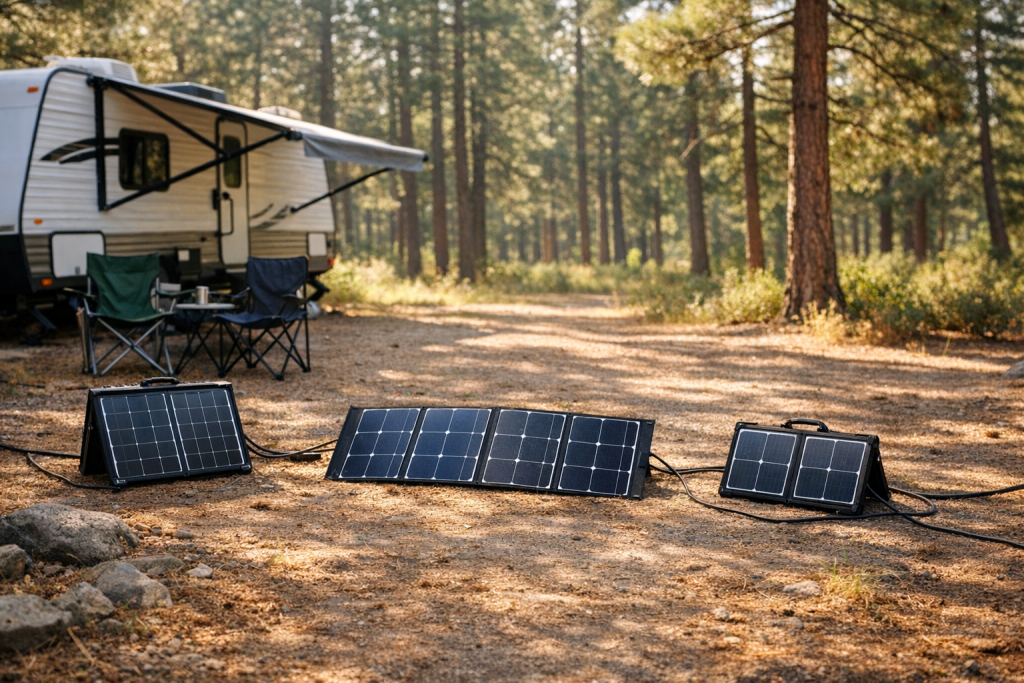
If your RV is parked and you cannot reorient the vehicle, portable ground-mounted panels on tilt legs give you full azimuth freedom — you can point them true south regardless of which direction the RV faces.
Best Tilt Mounting Options for RVs
Manual Tilt Brackets vs. Motorized Trackers
Manual tilt brackets are the dominant choice in the RV community, and for good reason. They are lightweight (typically 2–4 lb per bracket set), have no moving electrical parts to fail, and cost $40–$120 per panel. You set the angle by hand using detent pins or a threaded adjustment rod, then lock it in place.
Motorized single-axis or dual-axis trackers can increase daily yield by 20–35% by following the sun across the sky, but they add significant weight (10–30 lb), complexity, and cost ($300–$800+ per panel). They also require their own power draw and controller. For an RV that moves frequently and must stow panels flat for highway travel, the added complexity rarely justifies the cost.

Top Adjustable Tilt Kits for RV Solar
When selecting a tilt kit, match it to your panel dimensions and weight. Key specifications to verify
- Panel compatibility: Frame width and mounting-hole spacing (most kits fit standard 25–45 mm aluminum frames).
- Tilt range: Look for 0–60° or 0–90° adjustability to cover all seasonal angles.
- Wind rating: Kits rated for 30+ mph sustained winds are adequate for most boondocking; stow flat if storms are expected.
- Material: Anodized aluminum resists corrosion better than bare steel in humid or coastal environments.
Cost Comparison and Reliability Considerations
| Mount Type | Cost per Panel | Weight | Lifespan | Maintenance |
|---|---|---|---|---|
| Flat Z-brackets | $15–$30 | 1–2 lb | 10+ years | None |
| Manual tilt brackets | $40–$120 | 2–4 lb | 10+ years | Occasional pin/bolt check |
| Motorized single-axis tracker | $300–$500 | 10–20 lb | 5–8 years | Motor, gears, controller |
| Motorized dual-axis tracker | $500–$800+ | 20–30 lb | 5–8 years | Two motors, sensors, controller |
For the vast majority of RV installations, manual tilt brackets offer the best balance of cost, reliability, and performance. The 25–40% winter gain from correct tilt angle dwarfs the incremental benefit of motorized tracking at a fraction of the price.
Step-by-Step
Follow these steps to determine, set, and verify the optimal solar panel tilt angle for your RV at any campsite
- Determine your current latitude. Open your smartphone’s GPS or mapping app and note the latitude of your campsite to the nearest degree. Example: Moab, UT = 38.6°N → round to 39°.
- Choose your tilt strategy. Decide whether you will use the year-round angle (tilt = latitude), the seasonal simple formula (±15°), or the advanced declination formula. For stays under two weeks, the year-round angle is sufficient. For month-long winter boondocking, use the winter formula.
- Calculate your target tilt angle. Apply the chosen formula:
• Year-round: 39°
• Summer (May–Aug): 39° − 15° = 24°
• Winter (Nov–Feb): 39° + 15° = 54°
• Advanced winter: (39 × 0.9) + 29 = 64.1° ≈ 64° - Find true south. Correct your compass for local magnetic declination, or perform a solar noon shadow test. Mark the true-south direction relative to your RV’s orientation. If your RV cannot face south, plan to use ground-deployed panels aimed independently.
- Park or orient panels toward true south. If using roof-mounted tilt brackets, position the RV so the panel’s tilted face points within ±15° of true south. Energy loss from a 15° azimuth deviation is only about 1.5%, so perfection is not required — but 30° off costs roughly 5%.
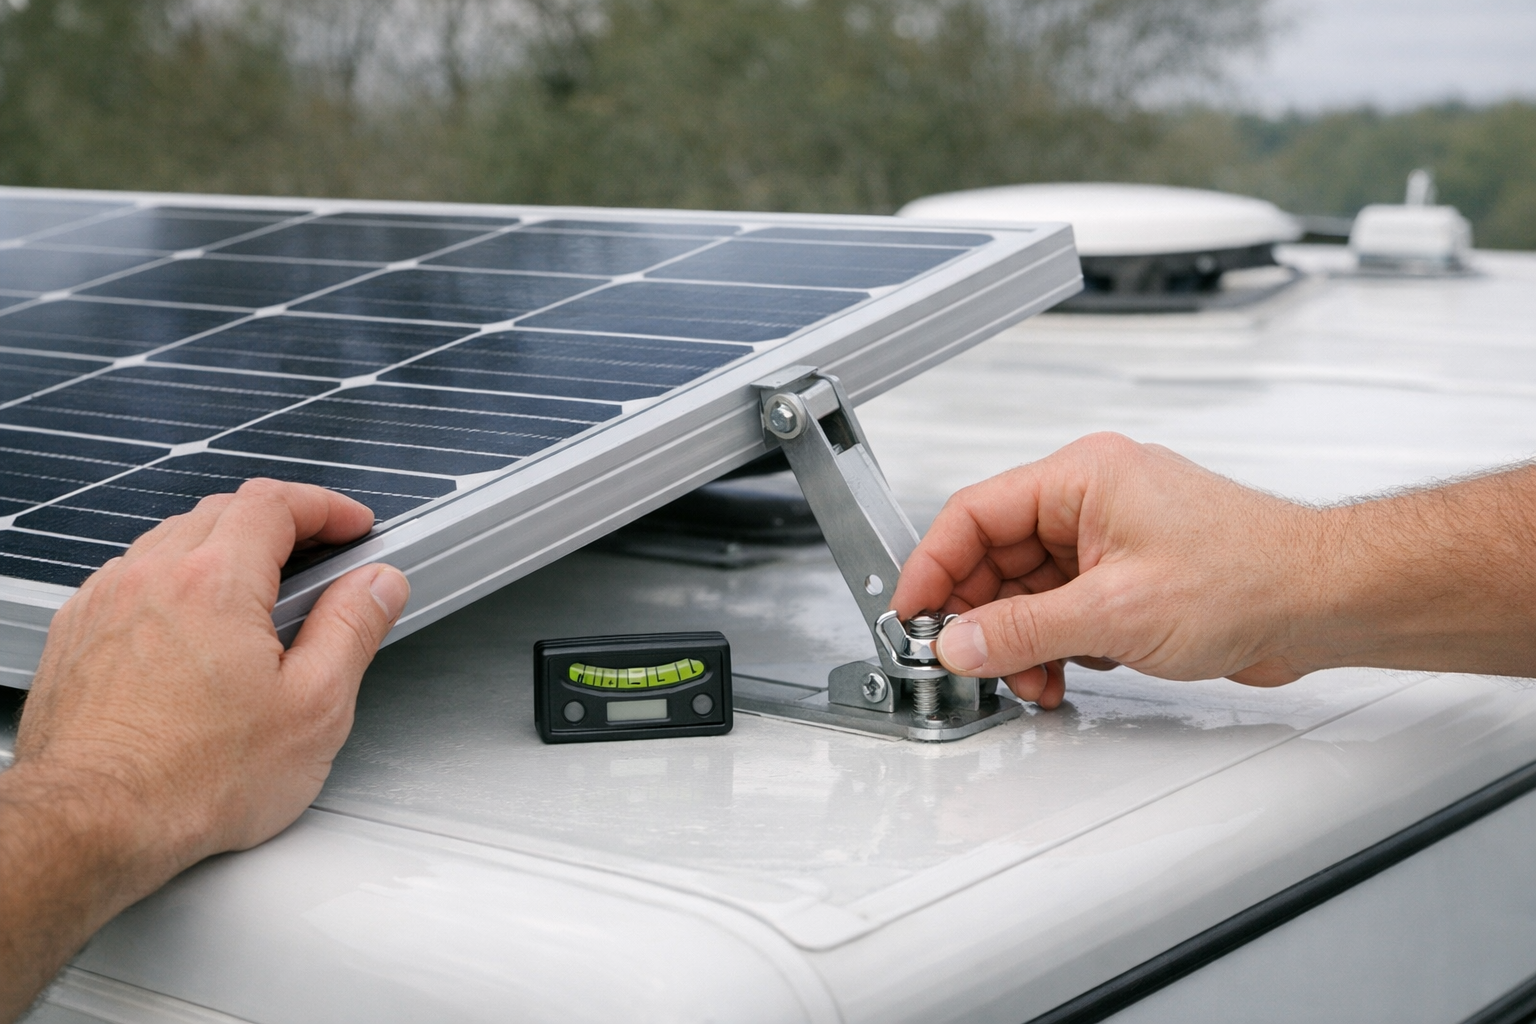
- Set the tilt angle on your brackets. Use a digital angle finder or smartphone inclinometer app placed on the panel glass to set the exact angle. Adjust the bracket’s support leg or detent pin until the reading matches your target. Lock all hardware securely.
- Verify output with your charge controller. After the panels are tilted and aimed, check your MPPT or PWM charge controller’s real-time wattage reading at solar noon. Compare this to the panel’s rated output adjusted for temperature and conditions. A properly tilted panel should reach 75–85% of its STC rating on a clear day at noon.
- Log baseline data. Record the date, latitude, tilt angle, compass heading, and peak wattage. This log becomes useful as you travel to new latitudes and can compare performance across campsites.
- Re-adjust when you move or the season changes. Each time you relocate more than 3–4° of latitude, or when the equinox arrives, recalculate and reset your tilt. A 5° latitude change shifts the optimal angle by 5° — enough to matter over a multi-week stay.
- Stow panels flat before driving. Always return tilt brackets to the 0° (flat) position and secure all locking pins before hitting the road. Wind load at highway speed on a tilted panel can damage brackets, roof mounts, and the panels themselves.
Safety Considerations
- Wind load: A tilted solar panel acts as a sail. At 50° tilt, a 200 W panel presents roughly 5.5 sq ft of wind-facing area. Secure all bracket hardware with lock nuts and check tightness daily. Stow panels flat if winds exceed 30 mph or if a storm is approaching.
- Roof integrity: Tilt brackets create leverage forces on roof-mount points that flat brackets do not. Use backing plates on the underside of the roof to distribute loads, and inspect sealant around bolt penetrations at least twice per season to prevent leaks.
- Electrical safety: Even two panels in series can produce 70–80 V open-circuit voltage. Always cover panels with an opaque blanket or disconnect them at the combiner box before adjusting tilt brackets. Working on live panels risks shock and arc flash.
- Ladder and roof safety: Adjusting roof-mounted panels requires climbing onto the RV roof. Use a stable, rated RV ladder, wear non-slip shoes, and never work on the roof in wet or icy conditions. Have a second person present as a spotter.
- Hot panel surfaces: In direct sunlight, panel glass and frames can reach 150°F (65°C) or higher. Wear gloves when adjusting brackets on sun-exposed panels, or make adjustments in the early morning before the panels heat up.
FAQs
- What is the best year-round tilt angle for RV solar panels? Set your tilt angle equal to your geographic latitude. If you are camped at 35°N, tilt your panels to 35°. This single angle maximizes total annual energy production by averaging the sun’s seasonal arc and is the ideal “set and forget” angle for RV owners who do not want to adjust seasonally.
- How much more power do I get by tilting RV solar panels in winter? Tilting to the winter angle (latitude + 15°) produces 25–40% more daily energy compared to flat-mounted panels during November through February. The exact gain depends on your latitude — higher latitudes see larger gains because the winter sun is lower. A 400 W RV array can harvest 400–800+ additional watt-hours per day in winter simply by tilting correctly.
- Should I adjust my RV solar panel angle seasonally? Yes, if you boondock across multiple seasons. A two-adjustment schedule — switching to summer tilt (latitude − 15°) around the spring equinox and winter tilt (latitude + 15°) around the fall equinox — captures roughly 95% of the available seasonal gains. For summer-only travelers, the year-round angle (tilt = latitude) is sufficient.
- What is the optimal solar panel tilt angle for my RV based on latitude, and how do I calculate it? This depends on your specific setup and requirements. Check the sections above for detailed guidance.
Conclusion
Every RV setup is different, so take the time to adapt each step above to your specific equipment, environment, and goals rather than copying values directly. Double-check every key decision against the reference points before committing. Keep a written record of what you chose and why so that future maintenance, troubleshooting, or upgrades start from a known baseline rather than guesswork.