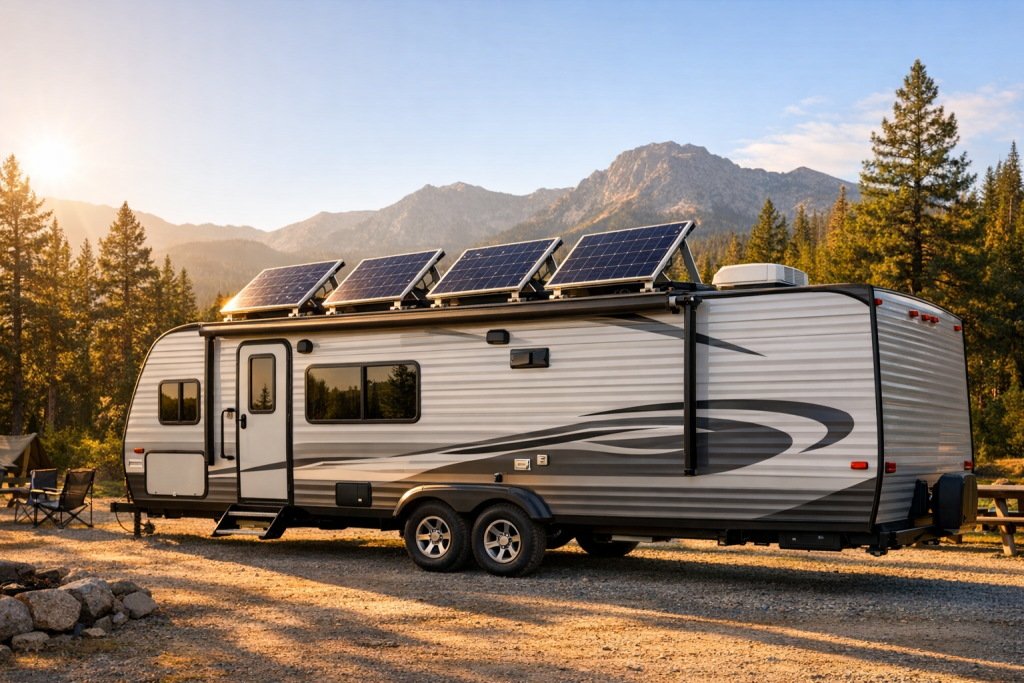
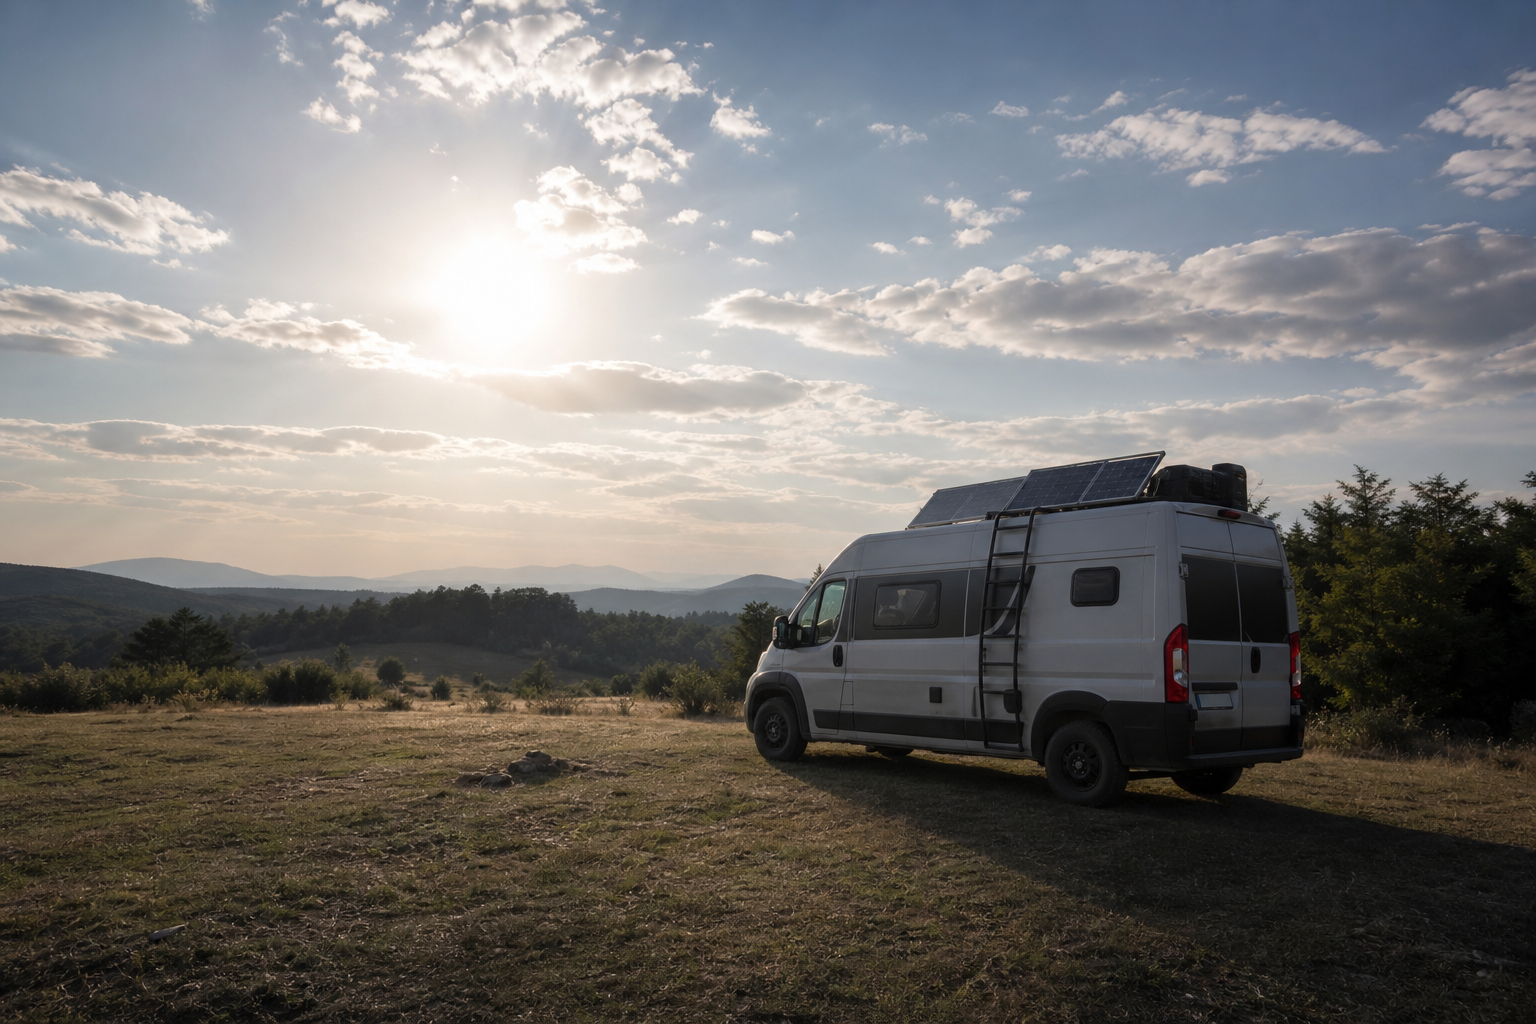
An RV solar array is not sized by gut feel or by copying what someone with a different rig, different route, and different appliances installed on their roof. It is sized by the intersection of three numbers you have to find for yourself: how many watt-hours your rig actually consumes in a day, how many peak sun hours your location delivers in the worst month you plan to camp, and how much of the panel’s nameplate rating you will realistically capture after losses. Get any one of those wrong and you either overspend on roof real estate you don’t need or you sit in a shaded campground watching the battery monitor drop while the fridge runs.
This guide walks through the sizing math, the regional reality of sun hours, the unavoidable losses that erode panel output, and the controller and battery matching that turns a pile of panels into a system. It deliberately avoids handing you a “200 W is enough for weekenders, 800 W for full-timers” cheat sheet, because those numbers assume a load profile and a climate that may not match yours.
TL;DR
- Know your daily Wh: Sum all loads to find total daily energy consumption.
- Divide by PSH × efficiency: Use your location’s peak sun hours and a system efficiency factor based on your actual installation losses.
- Size for worst month: Use the lowest PSH value in your travel range, not the annual average.
Start With Your Own Numbers, Not a Template
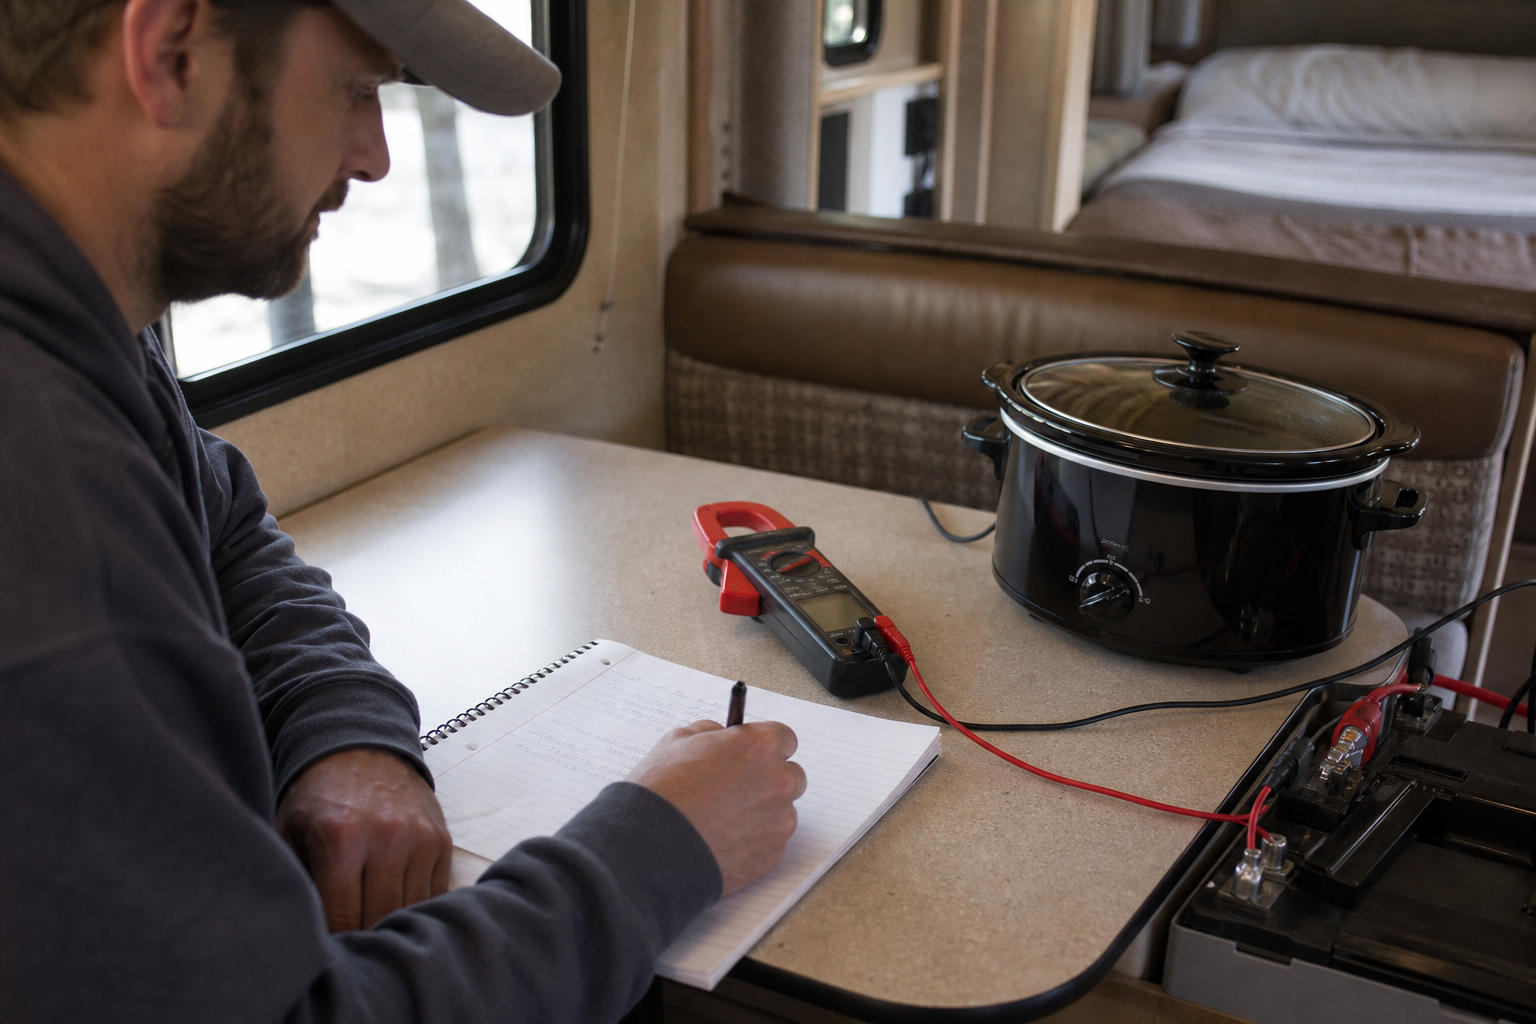
Before any panel decision, you need a daily energy audit in watt-hours. That means walking through every device in the rig — lights, water pump, vent fans, fridge (12 V compressor or absorption), inverter loads like laptops and induction cooktops, the furnace blower, entertainment, charging bricks — and recording each one’s actual draw and how many hours per day you run it. Read the nameplate, use a clamp meter on the DC side, or pull figures from the manufacturer’s datasheet.
A battery monitor with a shunt that logs daily Ah consumed is the single best tool here, because it tells you what your rig actually does instead of what you guess it does.
Multiply each device’s watts by hours of use per day, sum them, and you have your daily Wh target. That number — your number, not a category average — is the input to everything that follows.
Solar Sizing Worksheet
Fill in the worksheet below with your own values. The “Profile” column is just a label so you can compare scenarios (for example, “summer base camp,” “winter desert,” “shoulder-season travel”). The daily Wh comes from your audit. PSH comes from a solar resource lookup for your location and month (NREL’s PVWatts or the NREL solar resource maps are the standard references). The efficiency factor is your own estimate based on your wiring, controller type, mounting, and shading exposure — explained in the next sections.
| Your Profile | Your Measured Daily Wh (from your audit) | Your Location’s PSH (looked up, worst-case month) | Your System Efficiency Estimate | Required Watts (Daily Wh ÷ (PSH × Efficiency)) |
|---|---|---|---|---|
| (your profile) | (your value) | (your value) | (your estimate) | (calculated) |
| (your profile) | (your value) | (your value) | (your estimate) | (calculated) |
| (your profile) | (your value) | (your value) | (your estimate) | (calculated) |
| (your profile) | (your value) | (your value) | (your estimate) | (calculated) |
If you don’t yet have a measured daily Wh figure, stop and get one before buying panels. A sizing calculation built on guessed loads will be off by a factor that no amount of extra wattage can reliably mask.
Peak Sun Hours Explained
Peak sun hours (PSH) is not the same as daylight hours. One peak sun hour equals one hour of solar irradiance at 1,000 W/m² — the standard test condition panels are rated under. A location that gets 14 hours of daylight in June might deliver 6 to 7 PSH, because early morning, late afternoon, and any haze or cloud cover all count as fractional sun hours.
PSH varies dramatically by region and season. The desert Southwest in summer can exceed 7 PSH on a typical day; the same latitude in December still does well. The Pacific Northwest, the Great Lakes, and New England can drop to 1.5–2.5 PSH in winter under heavy overcast, and even sunny days are short and low-angle. Mountain valleys, dense forest canopies, and northern latitudes all reduce the figure further.
Look up PSH for your specific area using NREL’s PVWatts calculator or the NREL National Solar Radiation Database. Pull the monthly values, not just the annual average. The annual average flatters winter performance and will leave you short when you need power most.
Critical rule: size for the worst month you plan to camp in that location, not the annual average. If you’ll only boondock April through October, use April or October’s PSH. If you’re a full-timer following good weather, use the worst PSH on your seasonal route. If you stay put through winter in a cloudy region, that month’s PSH governs your array.
System Losses: Why Nameplate Watts Lie
A 400 W panel does not deliver 400 Wh in one peak sun hour. Several loss mechanisms stack between the cells and the battery, and the combined effect varies by installation, so there is no single universal derate percentage that fits every rig.
Charge controller losses
PWM controllers are simpler and cheaper but waste a significant portion of available power because they pull the panel down to battery voltage. MPPT controllers track the panel’s maximum power point and convert voltage efficiently, but still incur conversion losses that depend on the controller’s quality and how well-matched the panel voltage is to the battery bank. Higher-quality MPPT units with well-sized arrays lose less; cheap units, mismatched voltages, and units running near their thermal limits lose more.
Wiring losses
Voltage drop in the wire run from panels to controller and controller to battery costs you watts as heat. Long runs, undersized conductors, and many connection points all increase loss. Wire your array at higher voltage (panels in series, where the controller allows) to reduce current and therefore I²R loss. Use a voltage drop calculator with your actual wire gauge (AWG), run length, and current to estimate this for your install.
Temperature derate
Panels are rated at 25 °C cell temperature. On a hot roof in summer, cell temperatures can climb 30–40 °C above ambient, and output drops by roughly the panel’s temperature coefficient (a published spec — typically a fraction of a percent per °C above 25). Flush-mounted panels with no airflow underneath run hotter and lose more than tilted or standoff-mounted panels. Conversely, cold sunny winter days can produce more than nameplate watts — which is why cold-weather Voc matters for controller sizing.
Shading
RV roofs are obstacle courses: AC shrouds, vents, antennas, satellite domes, the refrigerator stack. Even partial shade on one cell can collapse output from an entire panel string depending on bypass diode arrangement. Trees at the campsite are worse. Real-world RV arrays routinely lose more to shade than to any other single factor. Map your roof obstructions and the sun’s path before finalizing panel placement.
Soiling, age, and orientation
Dust, pollen, bird droppings, and the inevitable haze of road grime all reduce output until you clean the panels. Panels degrade slowly over their lifespan (manufacturers publish degradation curves). And flat-mounted RV panels lose output compared to a panel tilted toward the sun’s angle — fine in summer near the equator, costly in winter at high latitudes.
Combine these factors into a single efficiency multiplier for the formula. A clean, well-wired, MPPT-controlled, lightly shaded summer install will retain a much higher fraction of nameplate than a hot, partially shaded, PWM-controlled flat-roof install in winter. Estimate honestly for your situation rather than borrowing someone else’s number.
The Sizing Formula
That is the entire core of the calculation. Daily Wh is your audited load. PSH is the worst-month figure for your location. System efficiency is your honest estimate of how much of the panels’ nameplate you’ll actually capture, expressed as a decimal (for example, 0.7 means you expect to retain 70% after all losses combined).
The result is the minimum nameplate panel wattage your roof needs to break even on a worst-month average day. Many builders add a margin on top — for back-to-back cloudy days, for unexpected loads, for battery charging headroom — by either oversizing the array, adding battery capacity, or planning for generator or shore power as backup.
Worked Examples
Example 1: Summer Boondocking in the Desert Southwest
Worked example — assumed values for illustration only, not defaults. Substitute your own audited Wh, your own looked-up PSH, and your own efficiency estimate.
Assumptions for this example:
- Assumed daily load: 1,500 Wh/day (an assumption for the example, not a recommendation — your audit may produce a very different number).
- Assumed PSH: 6.5 (illustrative figure for a sunny desert location in summer; check your specific site and month).
- Assumed system efficiency: 0.72 (illustrative — assumes MPPT controller, reasonable wire sizing, hot rooftop temperature derate, minor shading from a roof AC unit).
Required Watts = 1,500 ÷ (6.5 × 0.72)
Required Watts = 1,500 ÷ 4.68
Required Watts ≈ 320 W
With these assumed inputs, roughly 320 W of nameplate panel capacity would meet an average summer day in the desert. A builder with this load profile might install 400 W to add a margin for cloudy days, dust, and aging — but that margin decision is separate from the core sizing math.
Example 2: Year-Round Use in the Pacific Northwest
Worked example — assumed values for illustration only, not defaults. Substitute your own audited Wh, your own looked-up PSH, and your own efficiency estimate.
Assumptions for this example:
- Assumed daily load: 2,400 Wh/day (illustrative — heavier loads from longer indoor time, more lighting, furnace blower running on cold nights).
- Assumed PSH: 1.8 (illustrative figure for a cloudy PNW winter month; the same location in July might exceed 6 PSH — which is exactly why you size for the worst month).
- Assumed system efficiency: 0.65 (illustrative — assumes MPPT, more shading from low sun angle and surrounding trees, condensation/soiling, partly offset by cool panel temperatures).
Required Watts = 2,400 ÷ (1.8 × 0.65)
Required Watts = 2,400 ÷ 1.17
Required Watts ≈ 2,051 W
Over 2,000 W of solar to cover winter use in this scenario — a number that simply will not fit on most RV roofs. This is the realistic outcome for cloudy-winter, high-load profiles, and it’s why most full-timers in northern regions either migrate south for winter, accept a generator or shore power as the primary winter source, or dramatically reduce loads (propane heat instead of electric, no inverter cooking) to bring the required wattage into a feasible range. The sizing math is honest about what solar alone can and cannot do.
Run the same formula for your own loads, location, and month. The answer tells you whether solar is your primary source, a meaningful supplement, or a marginal trickle for that scenario.
Matching Panels to Battery and Controller
A correctly sized array is only useful if the rest of the system can absorb and store what it generates. Three matching decisions matter.
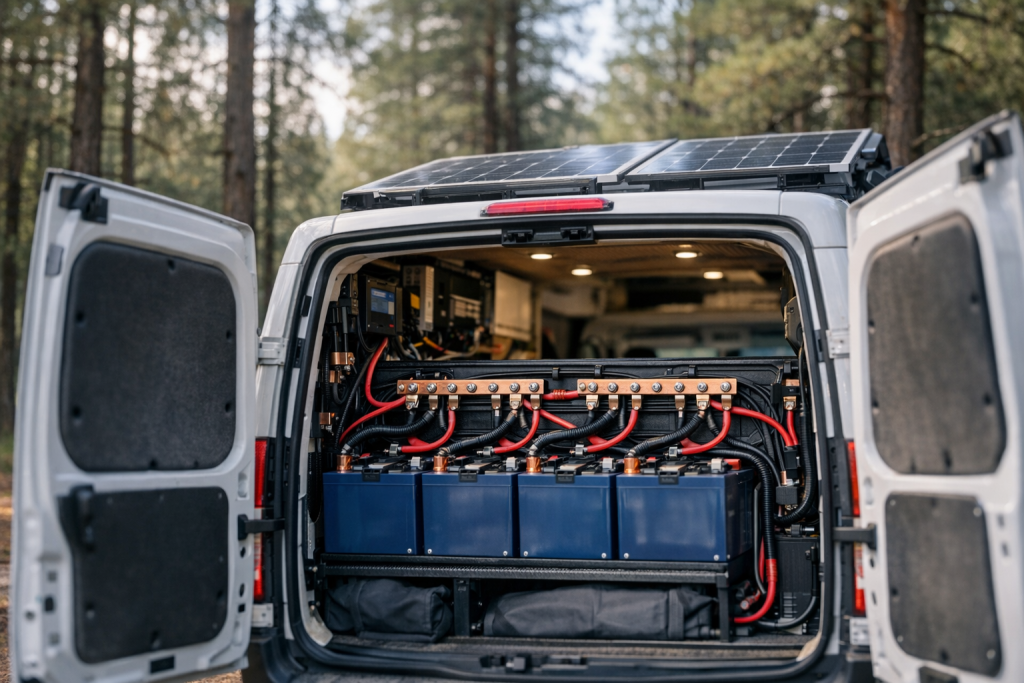
Battery bank capacity vs daily harvest
Your usable battery capacity must hold at least one full day’s load, ideally more, and must be able to accept the array’s peak charging current without exceeding the manufacturer’s recommended charge rate. Lithium (LiFePO4) banks typically allow much deeper discharge than lead-acid — but always size around the manufacturer’s recommended depth of discharge for your specific battery, not a generic assumption. A lead-acid bank’s usable fraction of nameplate Ah is smaller than lithium’s, so a lead-acid system needs a larger nameplate bank for the same usable energy.
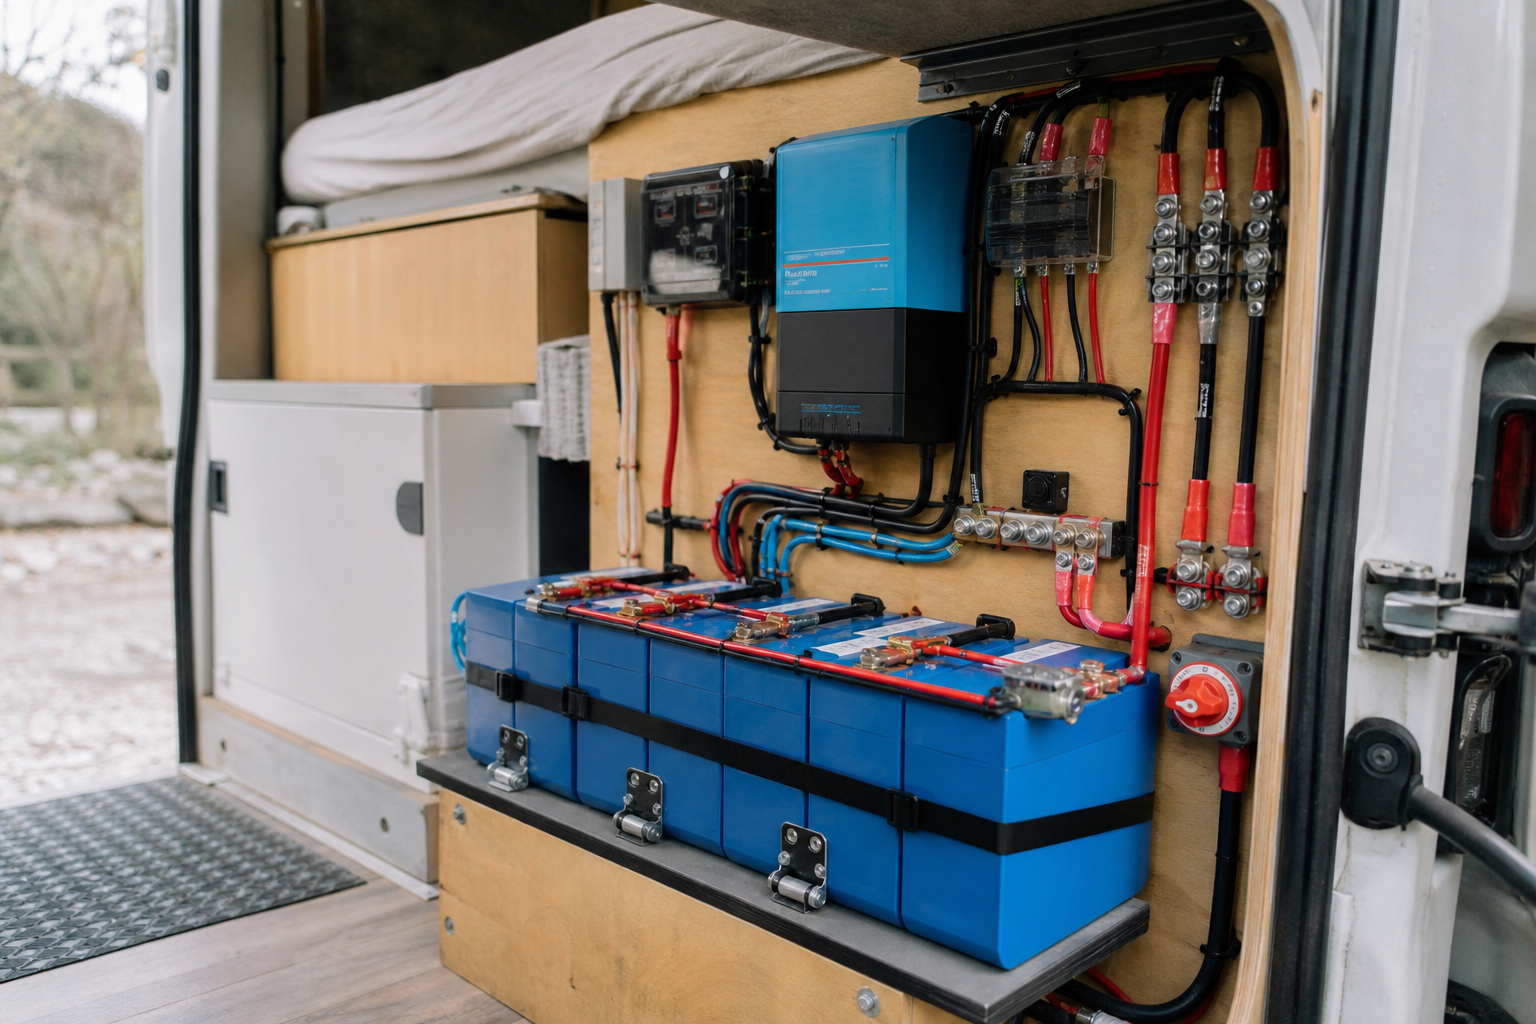
If your array can dump 80 A into a battery bank that the manufacturer rates for 50 A maximum charge, you have a mismatch — the controller will need to be configured to limit current, or the bank needs to be larger.
Charge controller sizing
- Maximum input voltage (Voc rating): Panel open-circuit voltage rises in cold weather. Calculate Voc at the coldest temperature you’ll see using the panel’s voltage temperature coefficient. The cold-weather Voc of your series string must stay safely below the controller’s max input voltage rating, with margin. Exceeding this kills controllers.
- Maximum charge current: The controller’s output current rating must match or exceed the maximum current your array can deliver into your battery voltage. Undersized controllers will clip output and waste panel capacity.
MPPT controllers are strongly preferred for any meaningful array because they extract more energy and let you wire panels in series at higher voltage, reducing wire size and loss. PWM controllers are acceptable only for very small, low-voltage installs.
Series, parallel, or series-parallel
Wiring panels in series increases voltage and reduces current — better for long wire runs and most MPPT controllers, but more vulnerable to total-string loss from partial shading on one panel. Parallel wiring keeps voltage low and isolates each panel from the others’ shading, but increases current and wire size. Series-parallel combinations balance both. Choose based on your roof layout, controller’s MPPT voltage window, and shade exposure.
Realistic Expectations: Summer vs Winter
The same array in the same rig will produce dramatically different daily energy across the year. Summer combines longer days, higher sun angles, and (depending on region) clearer skies — but also hotter panels and higher cooling loads. Winter brings shorter days, low sun angles that miss flat-mounted panels, more clouds, possible snow cover, and higher heating-related electrical loads from furnace blowers.
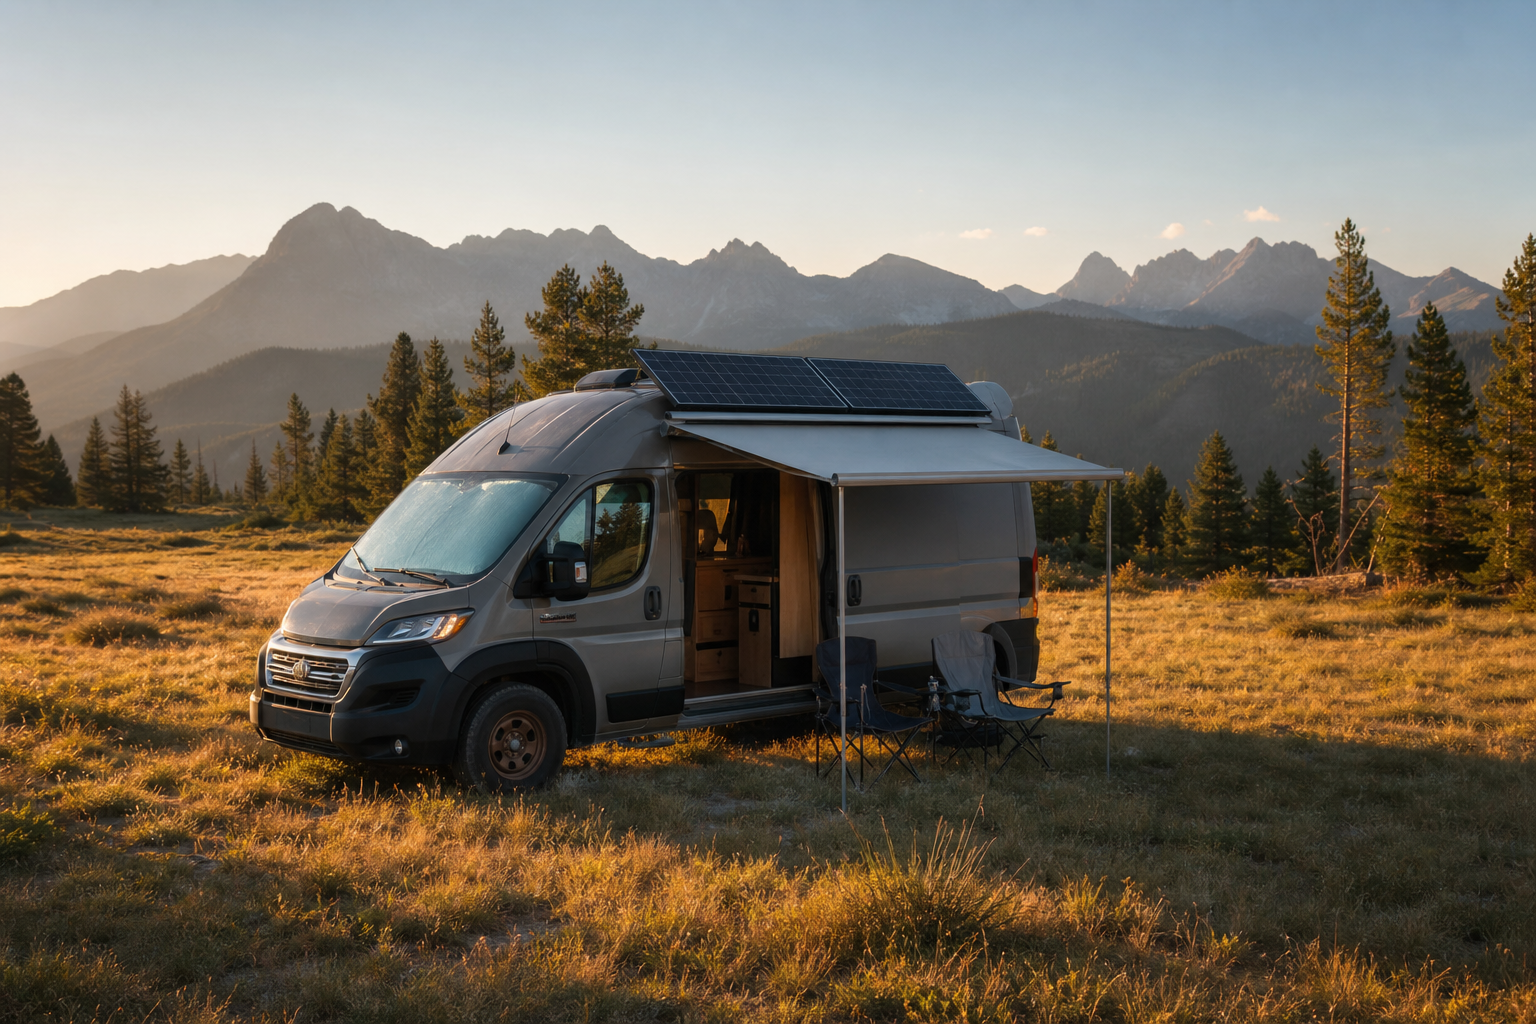
Expect summer harvest to be 2–4 times winter harvest at the same location with flat-mounted panels. Tilting panels toward the winter sun can recover a meaningful fraction of that loss, but tilting requires manual adjustment and isn’t practical while traveling. Most RV solar installs accept the flat-mount penalty in exchange for drive-anywhere convenience.
Honest planning means accepting that solar alone may not cover worst-month loads. A generator, shore power, or DC-DC charging from the engine alternator while driving are normal complements to a roof array, not admissions of failure. Builders who try to cover the worst winter week with panels alone often end up with arrays so large they can’t fit, or batteries so big they exceed payload.
Safety and Common Mistakes
- Fuse every parallel string and the battery connection. Each parallel panel string needs an inline fuse rated per the panel’s series fuse spec (on the datasheet) so a fault in one string can’t backfeed current from the others. The battery-to-controller connection needs a fuse close to the battery sized to the wire ampacity.
- Calculate cold-weather Voc. Use the panel’s temperature coefficient and the lowest expected ambient temperature. A controller rated 100 V input with a string Voc of 90 V at 25 °C may exceed 100 V on a cold sunny morning — and that one event can destroy the controller.
- Respect roof load limits. Panels, mounts, and any added structure add static load and dynamic load while driving. Check your RV manufacturer’s roof rating. Distribute weight across rafters where possible. Air-gap mounts that allow airflow under panels reduce thermal stress on both the panel and the roof membrane.
- Seal every roof penetration properly. Solar mounts that leak ruin roofs. Use the appropriate sealant for your roof material (EPDM, TPO, fiberglass, aluminum) and inspect annually.
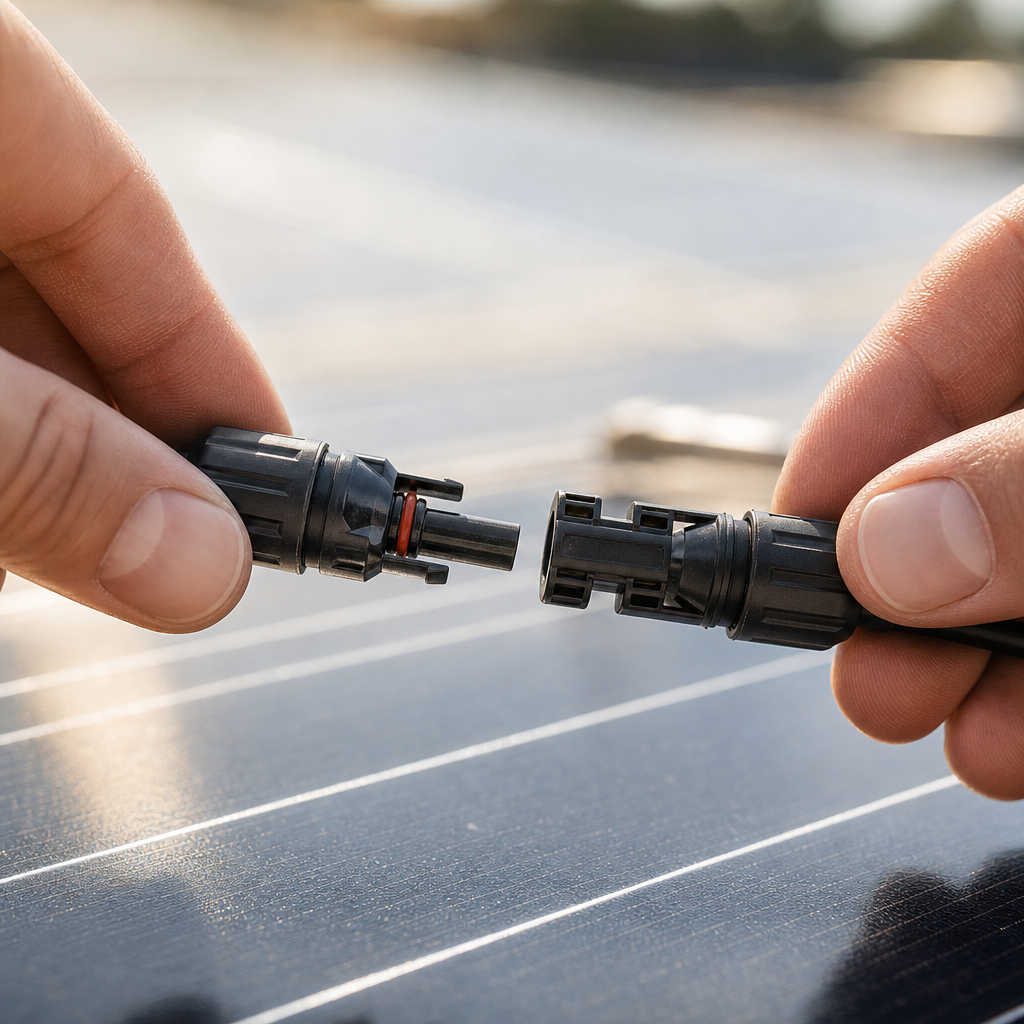
- Use correctly sized DC wire and proper connectors. Undersized wire wastes power and creates fire risk. MC4 connectors should be properly crimped (not just twisted) and weatherproofed. Run wires in conduit or loom where they cross sharp edges.
- Monitor actual harvest. A shunt-based battery monitor and a controller with logging let you compare predicted vs actual daily Wh in. If you’re consistently below your sizing estimate, your efficiency assumption was optimistic — adjust your expectations or address the cause (shading, soiling, wiring loss).
- Don’t mix mismatched panels in a string. Different wattages or different ages in series drag the whole string down to the weakest panel’s current. Keep strings uniform.
This is general guidance; follow your panel, controller, and battery manufacturer specifications and applicable electrical codes for your specific install.
FAQs
- Can I add more panels later? Yes, if your charge controller has headroom on both maximum input wattage and maximum input voltage, and if your battery bank can absorb the additional current within its manufacturer-rated charge rate. Plan the upgrade path when sizing the original controller — buying one size up is cheap insurance.
- Rigid or flexible panels? Rigid framed panels last longer, run cooler thanks to airflow underneath, and tolerate weather better. Flexible panels save weight and conform to curved roofs but run hotter when glued flat to the roof, degrade faster, and are harder to replace. Choose flexible only when weight or curvature genuinely require it.
- How do I match panels to my charge controller? Confirm the array’s open-circuit voltage at your coldest expected temperature stays below the controller’s max input voltage with margin. Confirm the array’s wattage at your battery voltage doesn’t exceed the controller’s rated charge current. Confirm the array operates within the controller’s MPPT voltage window for efficient tracking.
- Will a 200 W (or 400 W) array keep up with my fridge? It depends entirely on your fridge’s measured daily Wh consumption, your location’s worst-month PSH, and your system efficiency. Run the formula with your specific numbers — there is no universal answer.
- How do I size for full-time use in a 40-foot rig? Same way as for any rig: audit your actual daily Wh, look up worst-month PSH for the regions you’ll occupy, estimate your installation’s efficiency, and run the formula. Full-timers often discover that load reduction (propane appliances, efficient lighting, mindful inverter use) is more practical than chasing ever-larger arrays.
- How long to charge a 100 Ah battery from a 400 W array? At 12 V, 100 Ah is 1,200 Wh of nameplate capacity. Actual time depends on PSH, system efficiency, the battery’s accepted charge current (especially as it approaches full), and how deeply discharged it was. Use your audited PSH and efficiency in the formula to estimate for your situation.
Conclusion
Sizing an RV solar array comes down to one formula and three honest inputs. Start with your audited daily watt-hours — measured from your own rig’s loads, not estimated from a profile label. Look up your location’s peak sun hours for the worst month you plan to camp there, using a recognized solar resource like NREL or PVWatts. Estimate your system’s overall efficiency factor honestly, accounting for charge controller type, wire run, panel temperature, shading, soiling, and orientation. Divide daily Wh by the product of PSH and efficiency, and you have your minimum required panel wattage.
Size for the worst-case month, not the annual average, because solar shortfalls don’t average out — they show up as a dead battery on the cloudy December afternoon when you most need power. Match the resulting array to a charge controller that handles cold-weather Voc and full-array current, and to a battery bank that can accept the harvest within its manufacturer-recommended charge rate and depth of discharge. Then plan for the days when even a correctly sized system won’t keep up: a generator, shore power, alternator charging, or load reduction are legitimate parts of an off-grid power strategy, not signs that solar failed.