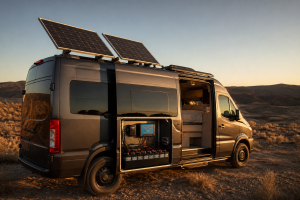
Do You Need a Generator If Your RV Has Solar?
On this page

TL;DR
- Audit daily Wh: Sum each load’s wattage × hours per day to find your total daily energy need.
- Apply DoD: Divide by the usable depth of discharge listed on your battery’s datasheet.
- Add autonomy days: Multiply by the number of days you want to go without charging.
Introduction to Battery Bank Sizing
Three numbers anchor your battery bank: total watt-hours consumed per day, the manufacturer-recommended depth of discharge for your chosen chemistry, and the number of days you must run without recharging. Get those three right and the sizing math is a short division problem. Get them wrong and you either overspend or wake up to dead batteries.
The method: audit your loads, understand usable capacity, apply the sizing formula, choose a system voltage, add autonomy days, and wire it all safely.
Daily Energy Audit
Everything downstream of this section depends on one number: how many watt-hours your rig actually consumes in a typical day. There is no shortcut, and there is no universal “average RV load” you can borrow, because two rigs of identical size can differ enormously depending on whether one runs a compressor fridge, a CPAP, an induction cooktop, or nothing but lights and a water pump. The audit forces you to use your own equipment’s real numbers instead of someone else’s guesses.
- The nameplate. Every appliance carries a label listing rated watts, or volts and amps (multiply the two to get watts). Nameplate figures are usually maximums, so treat them as conservative.
- The manufacturer datasheet. Datasheets often list both surge and continuous draw, plus duty-cycle information for compressor-driven appliances that cycle on and off.
- Direct measurement. A plug-in energy meter for AC loads, or a DC clamp meter on the positive lead for 12V loads, gives you the truth for your specific unit under your real usage. For anything that cycles — refrigerators especially — measure accumulated watt-hours over a full 24 hours rather than instantaneous watts.

Measurement beats estimation every time. If you own the gear already, spend a weekend metering it before you buy a single battery.
Next, estimate realistic daily hours of use for each item. Be honest: lights run longer in winter, fans run longer in summer, and phones charge more often than you think. Multiply rated watts by hours per day to get watt-hours per day for each line, then sum the column. Fill in the worksheet below with your own values — do not copy numbers from forums or generic tables, because those numbers were measured on someone else’s equipment.
Scroll sideways to see every column.
| Your Appliance | Rated Watts (nameplate / datasheet / measured) | Hours/Day (your estimate) | Wh/Day (Watts × Hours) |
|---|---|---|---|
| (your appliance) | (your value) | (your value) | (calculated) |
| (your appliance) | (your value) | (your value) | (calculated) |
| (your appliance) | (your value) | (your value) | (calculated) |
| (your appliance) | (your value) | (your value) | (calculated) |
| (your appliance) | (your value) | (your value) | (calculated) |
Sum the Wh/Day column for your total daily energy need. This is your baseline number for the rest of the article.
Correct for inverter losses. Any load that runs on AC through an inverter costs more energy than its nameplate suggests, because inversion is never perfectly efficient. Check your inverter’s datasheet for its efficiency curve, and divide each AC load’s Wh/day by that efficiency fraction before summing. Also account for the inverter’s own idle draw over the hours it stays switched on — that figure is in the datasheet too, and over a long day it is not negligible.
Finally, add a personal margin. Most people under-count. A modest cushion — many system designers add somewhere on the order of ten to twenty percent to the audited total — covers the phone charger you forgot, the extra hour of lights on a rainy evening, and battery self-consumption from monitors and detectors that never turn off.
One short rule worth memorizing: audit for your worst realistic day, not your best one.
Usable Capacity and Depth of Discharge
A battery’s rated amp-hour capacity is not the amount of energy you should plan to use. Every chemistry has a recommended depth of discharge (DoD) — the fraction of rated capacity you can draw per cycle without unacceptably shortening the battery’s life. Planning against 100% of rated capacity is the single most common sizing mistake, and it guarantees either premature battery death or chronic under-delivery on cold mornings when capacity sags further.
Flooded lead-acid and AGM. Lead-acid chemistries suffer accelerated plate degradation when discharged deeply. Manufacturers publish cycle-life curves showing how cycle count falls as DoD rises: shallow cycling yields many more cycles than deep cycling. Most lead-acid makers recommend keeping routine discharge to a moderate fraction of rated capacity, but the exact figure varies by model, plate design, and the cycle life you are targeting — read the curve on your specific battery’s datasheet and pick the DoD that delivers the cycle count you need.
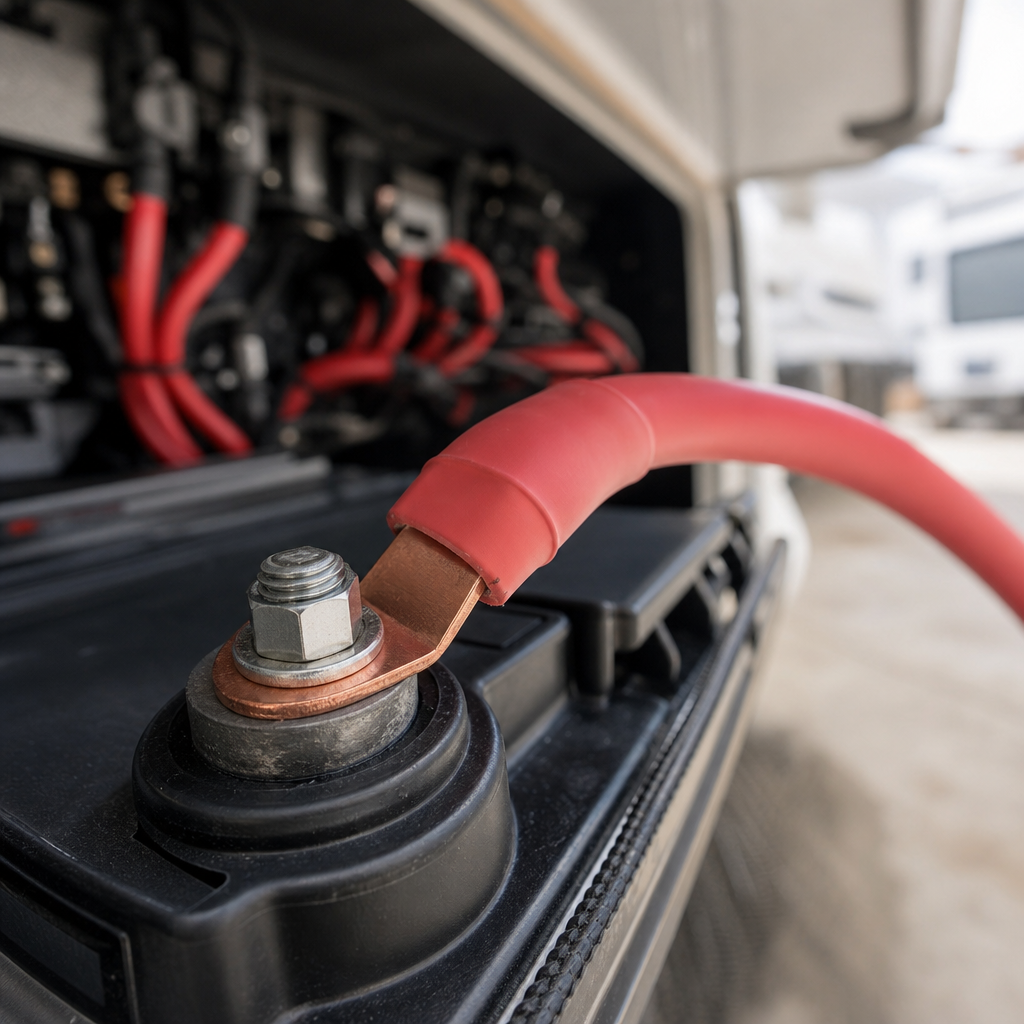
LiFePO4 (lithium iron phosphate). Lithium iron phosphate tolerates much deeper routine discharge than lead-acid, which is why a lithium bank of the same rated Ah delivers substantially more usable energy. But “much deeper” is not “all of it”: manufacturers still specify a recommended DoD tied to a warranted cycle count, and cycling shallower than that maximum extends life further. The correct DoD for your plan is whatever your battery’s manufacturer specifies for the cycle life you want — not a number pulled from a forum thread.
Gel and other chemistries. Gel batteries sit closer to AGM in behavior but are more sensitive to charge voltage; their datasheets specify both DoD guidance and strict charging limits. Whatever you buy, the datasheet is the authority.
- Temperature. All chemistries deliver less capacity when cold. Lead-acid capacity drops noticeably in freezing weather, and most LiFePO4 batteries must not be charged below freezing at all unless they have built-in heating — the BMS will (and should) block charging.
- Discharge rate. Lead-acid capacity ratings are specified at a particular discharge rate (commonly a 20-hour rate on the datasheet). Draw current faster than the rating basis and the battery delivers fewer total amp-hours. LiFePO4 is far less rate-sensitive, but its BMS enforces a hard maximum discharge current.
The takeaway is simple: usable energy = rated capacity × the DoD your manufacturer specifies for your target cycle life, further reduced by temperature and rate effects. Size against usable energy, never against the number printed largest on the label.
Battery Bank Sizing Formula
Read it left to right. Daily Wh is your audit total, corrected for inverter losses and margin. Dividing by system voltage converts energy into amp-hours at your bank’s nominal voltage — the unit batteries are sold in. Dividing by the DoD fraction inflates the result so that your daily consumption only draws the bank down to the manufacturer-recommended limit, not to empty.
A quick sanity check of the mechanics, using round assumed numbers rather than any real appliance data: if an audit totaled 1,000 Wh/day on a 12V bank, that is 1,000 ÷ 12 ≈ 83 Ah of daily draw. If the chosen battery’s datasheet recommended a 0.5 DoD for the owner’s cycle-life target, the minimum bank would be 83 ÷ 0.5 ≈ 167 Ah. The same 1,000 Wh at a 0.8 DoD would need only about 104 Ah — which is exactly why chemistry choice changes bank size so dramatically.
For multi-day autonomy, multiply the daily Wh (not the final Ah) by your autonomy days before running the formula — more on that below.
One caution: the formula sizes for energy, not for power. A bank can hold enough watt-hours yet still be unable to feed a large inverter’s peak current, especially with lead-acid, whose voltage sags under heavy load, or with a lithium BMS whose continuous-current limit is lower than the inverter demands. Check your inverter’s continuous and surge current requirements against the bank’s discharge ratings as a separate step.
Worked Examples
Example 1: Weekend Camper, 12V Lead-Acid (illustrative — assumed values, not a default profile)
Worked example — assumed values for illustration only, not defaults. Assume a weekend camper has completed the audit worksheet with their own metered gear and arrived at a total of 1,200 Wh/day, already including inverter losses and a safety margin. Assume they have chosen a specific AGM model whose manufacturer’s cycle-life chart shows that a 0.5 DoD delivers the cycle count they want. Both numbers are inputs invented for this example — your audit total and your battery’s recommended DoD will be different, and you must substitute your own.
1,200 Wh ÷ 12 V = 100 Ah of daily draw.
100 Ah ÷ 0.5 = 200 Ah minimum bank size.
Step 3 — check autonomy. If this camper wants two full days without any charging (cloudy weekend, no generator), the daily energy doubles first: 2,400 Wh ÷ 12 V = 200 Ah, then 200 ÷ 0.5 = 400 Ah of rated AGM capacity.
Notice the lead-acid penalty: to use 200 Ah over two days, this camper must buy and carry 400 Ah of rated capacity, plus the weight that comes with it. That trade-off is real, but so is AGM’s lower upfront cost — for a rig that camps a handful of weekends per year, it can still be the rational choice.
Example 2: Full-Timer, 12V LiFePO4 (illustrative — assumed values, not a default profile)
Worked example — assumed values for illustration only, not defaults. Assume a full-time boondocker has audited their rig — including a compressor fridge measured over 24 hours with an energy meter and an inverter idle allowance taken from the inverter datasheet — and arrived at 2,400 Wh/day. Assume their chosen LiFePO4 model’s documentation recommends a 0.8 DoD to meet its warranted cycle life. Again, both figures are illustrative inputs: substitute your own audit total and your own battery’s specified DoD.
2,400 Wh ÷ 12 V = 200 Ah of daily draw.
200 Ah ÷ 0.8 = 250 Ah minimum bank for one day of use.
Step 3 — add autonomy. A full-timer relying on solar might plan for two cloudy days: 4,800 Wh ÷ 12 V = 400 Ah, then 400 ÷ 0.8 = 500 Ah of rated LiFePO4 capacity.
Step 4 — power check. Before finalizing, this owner should confirm the bank’s combined BMS continuous discharge rating comfortably exceeds their inverter’s maximum continuous input current, and that surge loads (motor starts, compressor kick-on) fall within the BMS surge allowance. Splitting the bank across two or more batteries in parallel typically raises the combined discharge capability, but verify with the battery documentation.
Compare the two examples: the lithium bank supports double the daily consumption with only 25% more rated capacity than the AGM bank, because far more of each rated amp-hour is usable. That is the arithmetic behind lithium’s popularity among heavy users.
12V vs 24V Battery Banks
System voltage does not change how much energy you need — 2,400 Wh is 2,400 Wh — but it halves or doubles the current flowing through every cable, fuse, and bus bar. Power equals volts times amps, so the same load at 24V draws half the current it draws at 12V. Current is what sizes copper, and copper is expensive and heavy.
Why 24V helps. Halving current lets you use smaller-gauge cable for the same voltage drop, since resistive losses scale with the square of current. Large inverters become far more practical: the battery-side current of a big inverter at 12V can demand massive conductors and very large fuses, while the same inverter at 24V needs half the amperage. Solar charge controllers also stretch further, because a controller’s output is rated in amps — at 24V, the same controller handles twice the wattage of panels.
Why 12V persists. Nearly every native RV appliance — lights, water pump, furnace fan, vent fans, tank sensors, LP detectors — is built for 12V. A 24V bank feeding a 12V rig needs a DC-DC step-down converter sized for the combined 12V load, which adds cost, a failure point, and its own conversion losses (no converter is perfectly efficient). Alternator charging via DC-DC chargers and drop-in battery replacement are also simpler at 12V.
A practical rule of thumb: modest systems with mostly native 12V loads usually stay simplest at 12V. Systems with large inverters, big solar arrays, or long cable runs increasingly justify 24V (or 48V in very large builds), accepting the step-down converter as the price of thinner copper.
Whatever you choose, run the sizing formula at that voltage. The Ah result at 24V will be half the 12V figure for the same watt-hours — the energy stored is the same; only the unit changes.
Days of Autonomy
Autonomy is the number of consecutive days your bank must carry the rig with little or no charging input. For a boondocker, that means cloudy stretches when solar underperforms, quiet hours when a generator cannot run, or simply the choice not to carry a generator at all.

Choosing the autonomy number is a judgment call about your climate, season, and charging sources. Someone in the desert Southwest with a generously sized solar array may be comfortable planning for one to two low-sun days, while a Pacific Northwest winter camper might want three or more. If you carry a generator or can charge from the alternator while driving, you can plan leaner, because you have a fallback that does not depend on weather.
Two cautions. First, autonomy days multiply bank size linearly, and bank size multiplies cost and weight linearly — three days of autonomy is a serious investment, so be honest about how often you truly face back-to-back no-charge days. Second, remember that solar rarely delivers zero on a cloudy day; it delivers a reduced fraction. Many boondockers size for partial recharge on bad days rather than assuming total blackout, which lands the bank between the one-day and worst-case figures.
Short version: pick the longest realistic no-charge stretch you will actually sit through, multiply your daily Wh by that, and run the formula once.
Safety and Common Mistakes
A correctly sized bank installed badly is more dangerous than a small one installed well. Battery banks store enough energy to melt tools and start fires; treat the wiring with the same rigor as the sizing math.
- Fuse for the wire, close to the battery. Every positive conductor leaving the bank needs overcurrent protection sized to protect that conductor’s ampacity, placed as near the battery terminal as practical. Size the fuse from the connected load’s maximum continuous current (from its datasheet) with the headroom the fuse and equipment manufacturers specify, and confirm the wire gauge is rated above the fuse. Large lithium banks can deliver enormous fault currents, so use a fuse class with an interrupt rating appropriate for the bank — consult the battery and fuse manufacturers’ guidance.
- Fuse each parallel string independently. In a parallel bank, a shorted cell in one battery can dump the entire bank’s energy into that string. A fuse per string contains the fault.
- Balance parallel wiring. Take positive from one end of the bank and negative from the other (or use bus bars with equal-length leads) so every battery sees the same resistance and shares current evenly. Unbalanced strings age unevenly and can overwork one battery.
- Series strings must match. Batteries wired in series for 24V must be the same model, capacity, age, and state of charge. Mismatched series batteries drift apart, and the weakest one gets over-discharged and over-charged. Some LiFePO4 models are not rated for series connection at all — check before wiring.
- Never mix chemistries or ages in one bank. Different charge voltages and internal resistances mean one set chronically over- or under-charges. Replace lead-acid banks as complete sets.
- LiFePO4 requires a compatible BMS and charger profile. The BMS protects against over-charge, over-discharge, over-current, and cold-temperature charging — but it is a last-resort safety device, not a charge controller. Your converter, solar controller, and DC-DC charger must all have lithium-appropriate profiles; legacy lead-acid chargers can chronically under- or over-charge lithium.
- Ventilate flooded lead-acid. Charging flooded batteries releases hydrogen gas; the compartment must vent outside and keep spark sources away. AGM off-gasses far less but still should not live sealed next to ignition sources.
- Torque and inspect terminals. Loose high-current connections generate heat. Use the terminal torque spec, protect terminals from accidental shorting, and re-check after the first few trips.
- Install a battery monitor with a shunt. Voltage alone is a poor state-of-charge indicator, especially for lithium’s flat discharge curve. A shunt-based monitor turns your DoD plan into something you can actually verify day to day.
This information is general guidance, not a substitute for your equipment manufacturers’ instructions or applicable electrical codes.
FAQs
- How many amp-hours do I need for boondocking? There is no universal answer — it is your audited daily Wh, times your autonomy days, divided by system voltage, divided by your battery’s manufacturer-recommended DoD. Two rigs the same size can legitimately need banks that differ by a factor of three or more.
- Can I mix lead-acid and lithium batteries in one bank? No. Their charge voltages, discharge curves, and internal resistances differ enough that one chemistry will be chronically mistreated, creating both premature failure and safety risk. One chemistry, one model, one age per bank.
- Can I run an RV entirely on batteries and solar, without a generator? Many people do, if the bank and array are sized for their audited load and local sun. High-draw appliances such as air conditioning and electric heat are the usual dealbreakers — running them from batteries requires very large banks, so most all-solar rigs manage those loads with propane, shade, and timing instead.
- How do I know my bank is too small? If a shunt-based monitor shows you routinely reaching your chemistry’s DoD limit before your next charge opportunity, or if voltage sags enough under load to trip the inverter, the bank is undersized — re-run the audit, because the fix might also be trimming loads rather than adding capacity.
- Should I size the bank or the solar array first? The bank, and both come from the same audit. The bank covers your autonomy days; the array (plus alternator or shore charging) must then replace a full day’s Wh during available sun, accounting for the fact that charging is never lossless.
- Does cold weather change the sizing? Yes. Lead-acid delivers noticeably less capacity when cold, and most LiFePO4 batteries cannot accept charge below freezing without built-in heaters. If you camp in winter, size against your battery’s cold-temperature specifications, not its room-temperature rating.
Conclusion
Battery bank sizing reduces to a chain of four decisions, each feeding the next. First, establish your daily Wh total from a real audit — nameplates, datasheets, and metered measurements of your own gear, corrected for inverter losses and a margin, never borrowed “typical” figures. Second, fix the DoD fraction from your chosen battery’s own documentation, matched to the cycle life you want: lead-acid tolerates only moderate routine discharge, LiFePO4 considerably deeper, but in both cases the exact figure belongs to the manufacturer, not to a rule of thumb. Third, run the formula — Required Ah = (Daily Wh ÷ System Voltage) ÷ DoD — remembering that the Ah answer halves if you move from 12V to 24V while the stored energy stays the same. Fourth, multiply daily Wh by your autonomy days before the division if you boondock through no-charge stretches.
Then validate the result against reality: BMS and inverter current limits, cable and fuse sizing for the resulting amperage, matched batteries with per-string protection, and a shunt monitor so your planned DoD is something you can see rather than hope for. Do that, and the bank you buy will be the bank you actually needed — no bigger, no smaller, and safe.
Spot an error or an outdated detail in this guide?
Report it