How to Upgrade Your RV to Lithium Batteries (Step-by-Step)
On this page
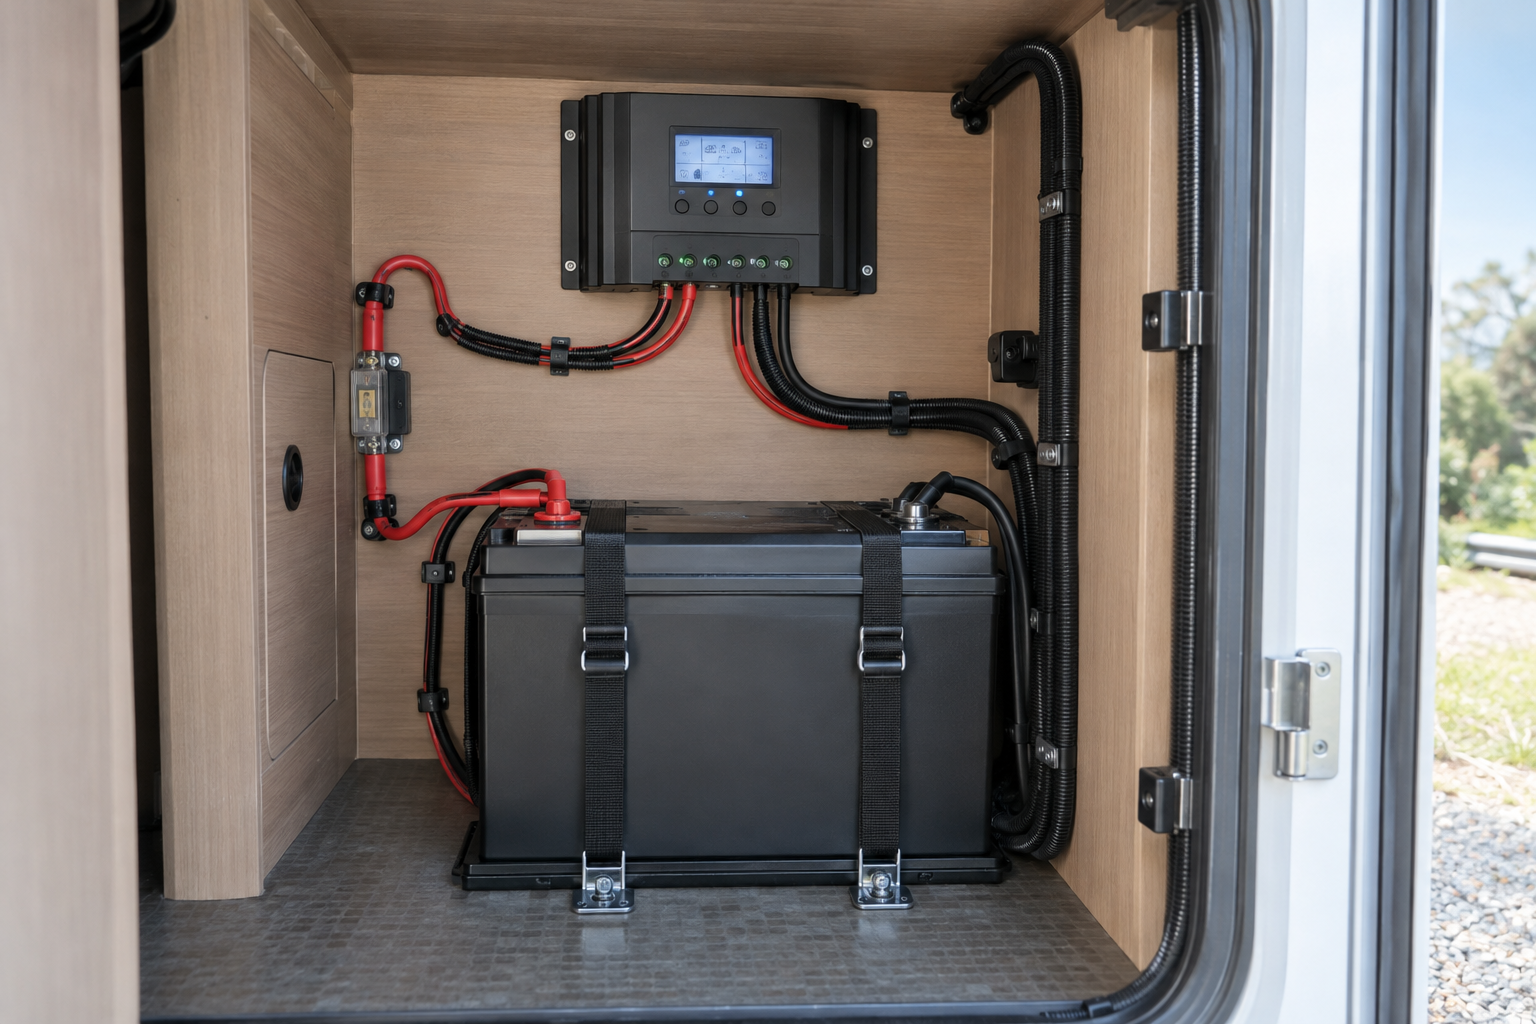
TL;DR
- Start: Measure your actual power use and size the lithium bank.
- Then: Install, secure, and wire the lithium batteries.
- Finish: Document the system and do a shakedown trip.
Introduction
A lead-acid house battery gives you only about half of its rated amp-hours before deep discharges start shortening its life. Swap in lithium iron phosphate (LiFePO4) and most of that rated capacity becomes usable, often in a lighter package. The exact usable share depends on the specific battery and its manufacturer’s guidance.
This article covers sizing a lithium bank, checking every charging source, removing the old batteries safely, and wiring, programming, and testing the new system.
What You’ll Need
A lithium conversion involves more than the battery, so the list below covers the full system. Some components in your rig may already be lithium-ready. Check each charging device’s datasheet for compatibility before you remove the old batteries or replace anything.
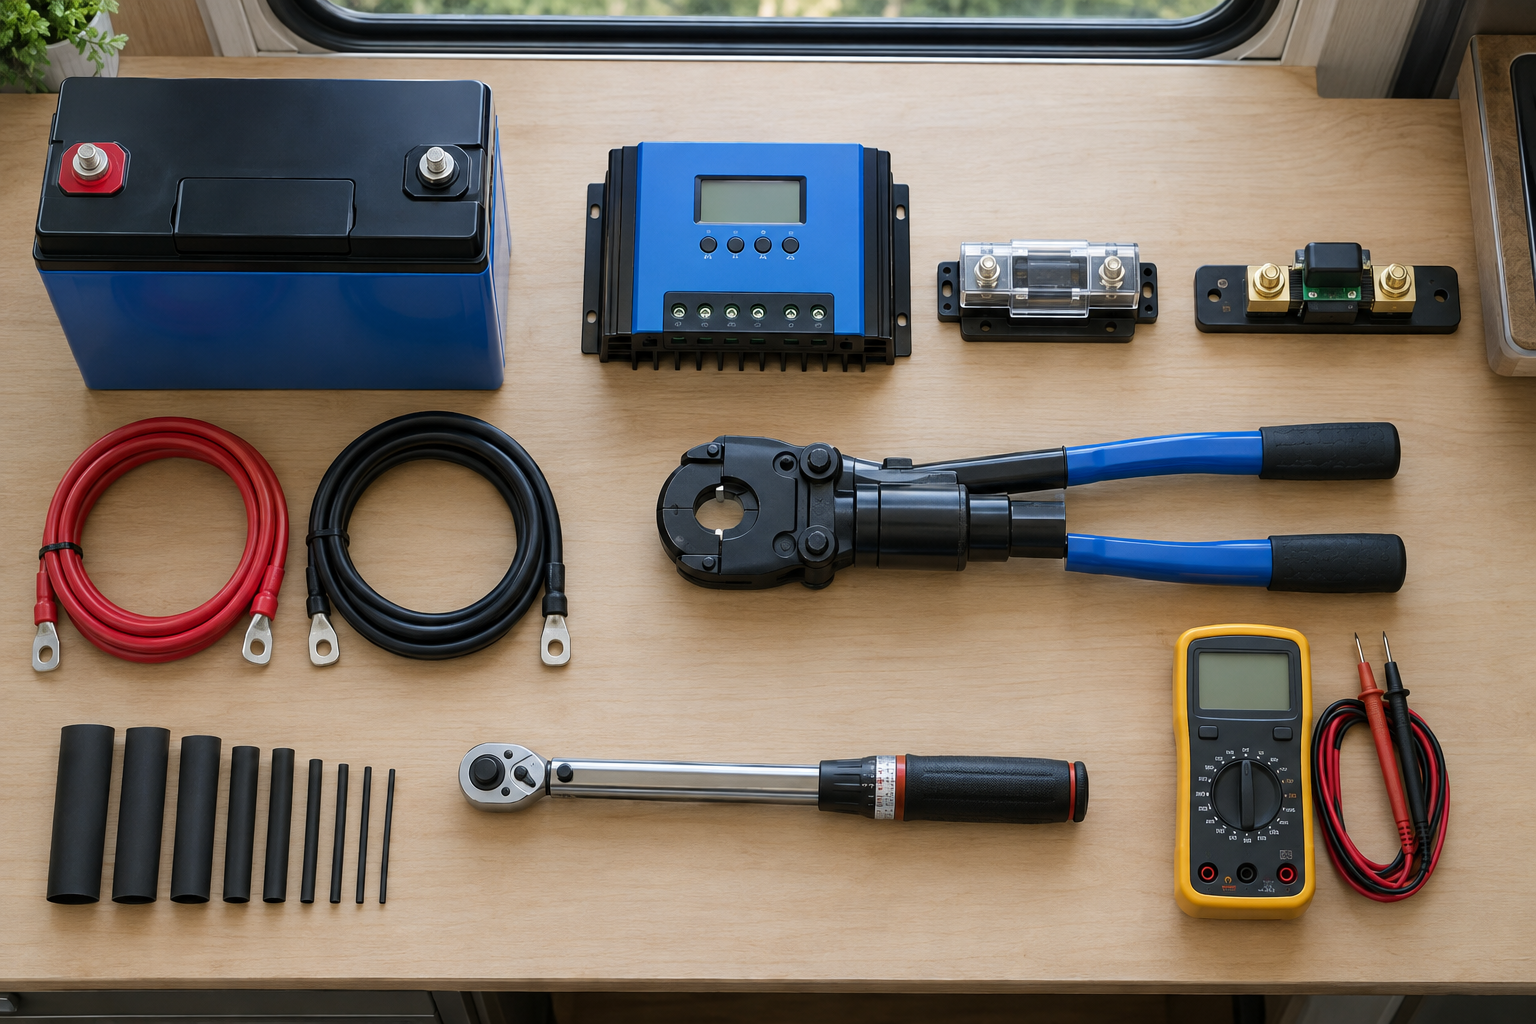
- LiFePO4 battery or batteries with a built-in BMS. The battery management system (BMS) protects against overcharge, over-discharge, overcurrent, and short circuit. Better units also block charging in freezing temperatures. Check the BMS continuous and surge discharge ratings on the datasheet.
- A lithium-compatible converter/charger. This can be a new converter, a replacement charging section for your existing converter, or an inverter/charger with a selectable or custom LiFePO4 profile.
- A DC-DC charger, if you charge from a tow vehicle or motorhome engine alternator. It regulates current and voltage from the engine side and protects the alternator.
- A solar charge controller with a lithium profile, or one that accepts user-defined absorption and float voltages, if you have solar.
- A shunt-based battery monitor, rated for your maximum system current.
- A main battery fuse with an interrupt rating suited to lithium, as specified by the battery maker. Class T and MRBF-style fuses are common choices. Mount it close to the positive terminal.
- Appropriately sized battery cables (AWG) with properly crimped lugs and adhesive-lined heat-shrink. You’ll also need busbars if you are paralleling multiple batteries or connecting many loads.
- A battery disconnect switch rated for the system current, if your RV doesn’t already have one or the existing one is undersized.
- Hold-down hardware: straps, brackets, or a tray that fits the new battery footprint.
- Tools: digital multimeter, DC clamp meter, insulated wrenches or socket set, a torque wrench or driver that matches the terminal torque spec, a hydraulic or heavy-duty lug crimper, wire cutters and strippers, a heat gun, a label maker or masking tape, and a wire brush or terminal cleaner. An infrared thermometer is useful for checking connections under load.
- Personal protective equipment: safety glasses, chemical-resistant gloves for handling the old lead-acid batteries, and baking soda solution for neutralizing acid residue.
- Documentation: datasheets and manuals for the new battery, converter, inverter, solar controller, and DC-DC charger, plus your RV’s 12V wiring diagram if one is available.
Prerequisite knowledge: You should be comfortable working with 12V DC systems, reading wiring labels, and using a multimeter. If your RV has a large inverter or undocumented wiring, have a qualified RV technician review the plan. At minimum, have them check the final installation.
Sizing, Removing, Installing, and Programming Your Lithium Battery Bank
The ten steps below run in order: plan first, then remove, install, program, and test. Don’t skip the charging-source audit in step 2, because it decides what else you need to buy.
- Measure your actual power use and size the lithium bank. Don’t base your new bank on the rating printed on the old one. Work out what you really consume, device by device.
For each 12V or 120V device you run off-grid, find its power draw on the nameplate or manufacturer datasheet, or measure it directly. A DC clamp meter on the battery cable shows current at 12V. A plug-in watt meter works for 120V appliances running through an inverter. Then estimate the hours each device runs per day.
Use this reader-fill table to build your daily energy budget:
Scroll sideways to see every column.
Device Power (W) — from nameplate or measured Hours used per day Daily energy (Wh) = W × hours (your appliance) (your value) (your value) (calculated) (your appliance) (your value) (your value) (calculated) (your appliance) (your value) (your value) (calculated) (your appliance) (your value) (your value) (calculated) Inverter idle draw (if left on) (from datasheet) (your value) (calculated) Parasitic loads (detectors, control boards, stereo memory) (measure with all loads off) 24 (calculated) Total (sum) If you run 120V loads through an inverter, divide those loads’ watt-hours by the inverter’s efficiency from its datasheet. That accounts for conversion losses.
Next, apply the sizing formula:
Required bank capacity (Ah) = (Daily Wh × days of autonomy) ÷ nominal system voltage ÷ usable depth of discharge
For a 12V LiFePO4 bank, nominal voltage is usually 12.8V. Use a sizing margin based on the component, load profile, and manufacturer documentation. Confirm the figure against your specific battery’s datasheet, since manufacturers rate cycle life at a stated depth of discharge.
Worked example — assumed values for illustration only, not defaults: Assume your measured total is 1,200 Wh per day and you want two days of autonomy without recharging. You plan to use 90% of a 12.8V lithium bank. That works out to 1,200 × 2 ÷ 12.8 ÷ 0.9 ≈ 208 Ah, so you’d choose a bank of at least that size, for example about 210–230 Ah. The same budget on 12V lead-acid at 50% usable gives 1,200 × 2 ÷ 12 ÷ 0.5 = 400 Ah. Recalculate using your own measured values.
Also check peak current. If you plan to run high-draw appliances through an inverter, the battery’s BMS must be able to supply the inverter’s maximum DC input current, taken from the inverter datasheet.
A common mistake is buying a single battery whose BMS trips the moment a heavy inverter load starts. Paralleling batteries, or choosing models with higher BMS ratings, solves this. -
Audit every charging source and confirm lithium compatibility. List everything that can put current into the house battery:
- the converter/charger
- an inverter/charger
- the solar charge controller
- the alternator charge path (the trailer 7-way charge line, or a battery isolator or combiner in a motorhome)
- any portable or auxiliary chargers
For each one, check the manual or datasheet for a LiFePO4 profile or user-adjustable voltages.
This is the step most “just drop it in” advice skips.
Many older RV converters were designed for lead-acid. They may hold a voltage too low to fully charge LiFePO4, or apply a float or desulfation mode that lithium doesn’t need. LiFePO4 makers typically specify an absorption or bulk voltage in roughly the 14.2–14.6V range for a 12V battery, plus a lower float or none at all. Your battery’s datasheet is the authority. Write down its recommended charge voltage, float voltage, maximum charge current, and low-temperature charge limit.
Decide on a fix for each source:
- Converter: reprogram it, swap in a lithium-compatible charging section where the manufacturer offers one, or replace the unit.
- Inverter/charger: select the lithium profile or enter custom values.
- Solar controller: select the lithium profile or enter custom values. Disable temperature compensation and equalization.
- Alternator: plan a DC-DC charger. Lithium’s low internal resistance lets it pull far more current than a lead-acid battery. That can overheat an alternator, especially at idle, and stress the vehicle’s wiring.
- Choose batteries that fit the space, the climate, and your current needs. Measure the battery compartment and confirm the terminal type and orientation. LiFePO4 batteries often come in standard group sizes, so many fit existing trays. Some higher-capacity models are taller or deeper, and the compartment door may not close over them.
If you camp in freezing weather, choose a battery with low-temperature charge protection, or ideally built-in self-heating. Most LiFePO4 cells should not be charged below about 32°F (0°C). Discharging in the cold is generally permitted within the maker’s stated range.
If you need more than one battery, buy identical models from the same manufacturer, ideally from the same batch. Mixing brands, capacities, or ages in one bank causes uneven current sharing.
Never mix lithium and lead-acid in the same bank. The two chemistries charge at different voltages, so one will always be overcharged or undercharged. - Shut everything down and disconnect power in the correct order. Unplug shore power and turn off the generator. Switch the inverter and inverter/charger fully off. Open the solar disconnect or breaker between the panels and the controller, then open the controller-to-battery breaker. On a motorhome, turn the engine off. On a towable, unplug the 7-way connector from the tow vehicle. Set the RV’s battery disconnect switch to off.
Before you touch any cable, photograph the existing battery wiring from several angles. Label every conductor: main positive, main negative, converter, solar, inverter, chassis ground, and any small sense or signal wires. Remove the negative cable first, then the positive. Insulate the loose cable ends with tape or terminal covers so they can’t touch the chassis or each other. - Remove the lead-acid batteries and prepare the compartment. Flooded lead-acid batteries are heavy and may have acid residue on the case. Wear eye protection and gloves, lift with your legs, and get a second person if the compartment is awkward to reach.
Clean the tray and the cable ends. Neutralize any acid with a baking soda solution, rinse, and dry completely. Replace any cable lugs that are corroded, green, or loose in the crimp. Corroded terminals add resistance that a high-current lithium system will expose quickly.
Take the old batteries to a recycling point that accepts lead-acid; most auto parts and battery retailers do. Never put them in household trash.
LiFePO4 batteries don’t vent hydrogen during normal charging, so some owners move the bank inside the coach. An indoor location protects it from cold and keeps cable runs short. If you relocate the bank, plan new cable runs and confirm the location can handle the weight securely. Keep the batteries away from water intrusion and direct engine or exhaust heat. -
Install, secure, and wire the lithium batteries. Set the batteries in place and secure them with straps or brackets.
A lighter battery isn’t automatically a secure one. Highway vibration and braking forces will shift an unsecured battery and stress its terminals.
For multiple 12V batteries in parallel, follow these practices:
- Use cables of equal length and gauge between batteries.
- Take the main positive from one end of the bank and the main negative from the opposite end. This is called diagonal or cross-connected wiring. Alternatively, run each battery to common positive and negative busbars with equal-length cables. Both methods help the batteries share current evenly.
- Before connecting batteries in parallel, charge each one fully on its own, or at least bring them to the same voltage, so they start balanced.
Size cables for the maximum continuous current the system will see, including inverter peaks. Account for both ampacity and voltage drop over the total cable length, using a reputable ampacity chart or calculator. Install the main fuse on the positive cable as close to the battery as practical. Use the fuse type and rating the battery manufacturer specifies, and make sure the cable is rated above the fuse. Lithium batteries can deliver very high short-circuit current, which is why a high-interrupt-capacity fuse matters.
Connect the positive cable first and the negative last. Torque every terminal to the battery maker’s specification. Under-torqued lugs heat up under load, and over-torqued ones can damage terminal threads.
-
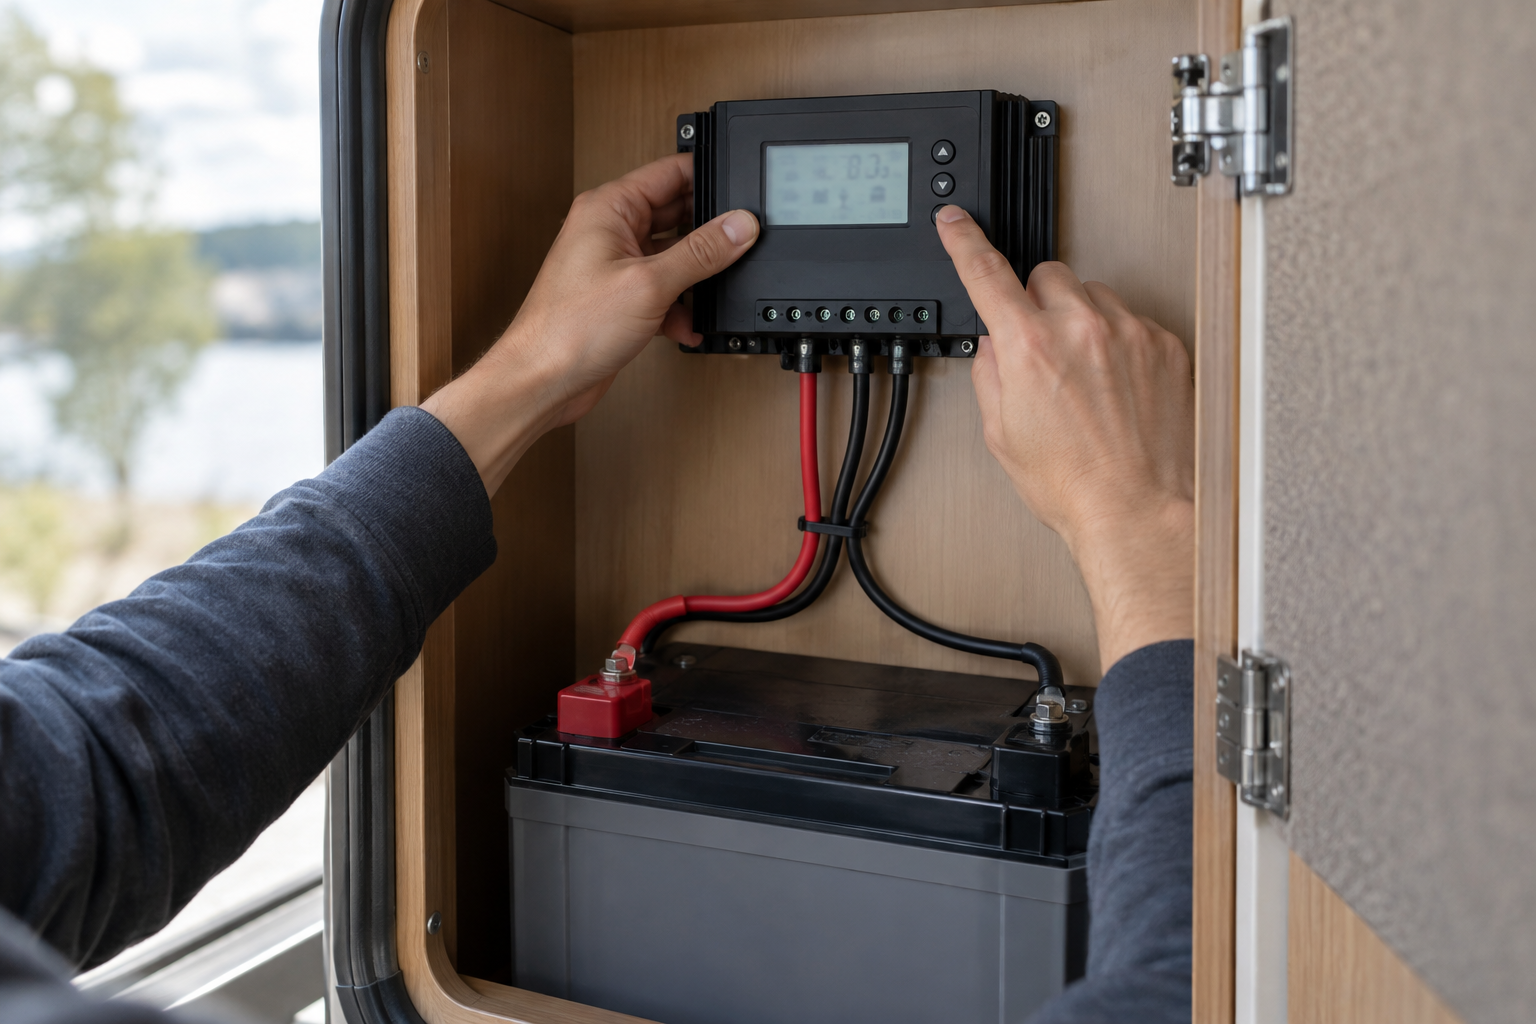
Upgrade or reprogram every charging source with lithium settings. Work through your list from step 2.
- Converter/charger: Install the lithium-compatible unit or set the existing one to its LiFePO4 mode. Confirm its maximum charge current doesn’t exceed the battery’s recommended charge current.
- Inverter/charger: Select the LiFePO4 profile or enter custom absorption, float, and absorption-time values from your battery datasheet. Turn off equalization and disable temperature compensation, both of which are meant for lead-acid. Set the inverter’s low-voltage cutoff so it shuts down before the BMS does, so the battery isn’t hitting its protection limit repeatedly.
- Solar charge controller: Choose its lithium setting, or enter user-defined values that match the battery datasheet. Disable equalization and temperature compensation unless the controller manual says its lithium mode handles these correctly. If the controller supports a low-temperature charge cutoff using a temperature sensor on the battery, enable it.
- DC-DC charger: Mount it near the house battery. Feed its input from the vehicle side through a fused cable and connect its output to the house bank through another fuse. Wire the ignition or engine-run signal as the manual instructs so it only charges while the engine runs. Select the LiFePO4 output profile. If your vehicle has a smart or variable-voltage alternator, use the charger’s mode for that alternator type.
- Battery isolators and solenoids: If a motorhome uses a simple isolator or combining solenoid between the chassis and house batteries, the DC-DC charger generally replaces that direct connection. Follow the DC-DC charger’s wiring diagram rather than leaving both paths active.
Don’t assume a “lithium” label means the right voltages. Compare each device’s lithium profile to your battery’s datasheet values, and use custom settings if they don’t match.
- Install a shunt-based battery monitor and program it. On lithium, voltage is a poor fuel gauge. LiFePO4 holds a very flat voltage across most of its charge range, so the dash panel’s voltage bars or LED meter can read “full” until the battery is nearly empty. A shunt monitor counts the current going in and out and reports state of charge accurately.
Install the shunt in the main negative cable. The battery negative goes to one side of the shunt. Every negative load and charger connection goes to the other side, typically through a negative busbar.
Nothing except the shunt should connect directly to the battery negative terminal. If anything bypasses the shunt, the monitor will miss that current.
Connect the monitor’s small positive supply lead through its inline fuse. In the monitor’s settings, enter your total bank capacity in amp-hours and choose the LiFePO4 battery type. Set the charged voltage slightly below your charger’s absorption voltage. Set the tail current and charge efficiency according to the monitor manual. After the first full charge, the monitor synchronizes to 100%. -
Power up, test, and verify every charging and discharging path. Close the battery disconnect, then the main fuse holder or breaker. Check resting voltage at the battery terminals with your multimeter and compare it to the battery’s datasheet. Some BMSs ship in sleep mode and need a brief charge to wake up. If the battery reads near zero, check the manual before troubleshooting further.
Then test each source one at a time:
- Shore power: Plug in and confirm the converter or inverter/charger enters bulk charging. Watch the voltage rise to the programmed absorption value and verify that charge current shows on the monitor.
- Solar: Reconnect the controller. Connect the battery side first, then the panels, or follow the order in the controller manual. Confirm it reports the lithium profile and is charging.
- Alternator: Start the engine, or connect the tow vehicle. Confirm the DC-DC charger activates and use a clamp meter to check that it delivers its rated current. Check cables and connections for heat by hand or with an infrared thermometer.
- Loads: Run your highest-draw appliance through the inverter and confirm the BMS doesn’t trip. Check every connection after a few minutes of heavy load. A warm lug points to a loose or poorly crimped connection.
Finally, turn the RV’s battery disconnect off and measure for any remaining current with the clamp meter. Some RVs have parasitic loads wired ahead of the disconnect, such as propane detectors or control boards. A lithium bank left in storage with an unnoticed drain can run down until the BMS shuts off. Many lithium makers recommend storing at a partial state of charge with all loads disconnected, so check your battery’s storage guidance before long-term storage.
-
Document the system and do a shakedown trip. Write down every setting you programmed and keep the list in the RV:
- charge voltages for each charger
- inverter low-voltage cutoff
- monitor capacity
- fuse ratings
Include a simple wiring sketch. A firmware reset or a component replacement can quietly restore lead-acid defaults, and a written record makes the problem easy to spot.
Before a long trip, take a short one and use the RV the way you normally would. Track daily consumption on the monitor and compare it with your estimate from step 1. Note how quickly each charging source refills the bank. That data tells you whether you need more capacity, more solar, or a larger DC-DC charger.
Recheck terminal torque after the first few hundred miles, since vibration can loosen connections.
Safety Considerations
- Always fuse at the battery. LiFePO4 batteries can deliver very high short-circuit current. Place a main fuse with adequate interrupt capacity close to the positive terminal, and use cables rated above the fuse.
- Use insulated tools and remove jewelry. A wrench bridging the positive terminal and the chassis can weld itself in place, cause severe burns, or damage the battery. Disconnect the negative first when removing batteries, and connect it last when installing.
- Don’t charge below freezing unless the battery is protected. Charging LiFePO4 cells below about 32°F (0°C) can cause permanent damage. Use batteries with low-temperature charge cutoff or self-heating, plus charger or controller temperature sensors where available.
- Handle the old lead-acid batteries carefully. They contain sulfuric acid and lead. Wear eye protection and gloves, keep them upright, neutralize spills with baking soda, and recycle them properly.
- Never mix chemistries or bypass the BMS. Keep lithium and lead-acid in separate banks with separate charging. Never wire around or disable the battery’s internal protection to “get more power.”
- Secure the batteries and protect the cables. Strap batteries down firmly. Route cables away from sharp edges and heat sources, and use grommets or loom where cables pass through metal or wood. Chafed cables are a fire risk.
Always follow your battery and component manufacturers’ instructions, and consult a qualified RV technician if you are unsure about any part of the installation.
FAQs
- Can I just swap my lead-acid RV battery for a lithium battery? Physically, yes, since many LiFePO4 batteries come in standard group sizes and use the same terminals. However, your converter, alternator charging, and solar controller may need upgrades or reprogramming to charge lithium properly and safely. A pure drop-in swap commonly leaves the battery never fully charged or overheats the alternator.
- Do I need a new converter for lithium batteries? Usually yes, if your current converter lacks a lithium charge profile. Many older units hold a voltage too low to fully charge LiFePO4 or use lead-acid modes the battery doesn’t need. Some brands offer a lithium-compatible replacement charging section, while others require a full replacement, so check the converter’s manual.
- Will my RV alternator charge lithium batteries, and do I need a DC-DC charger? An alternator can charge lithium, but lithium’s low internal resistance can draw excessive current and overheat the alternator, especially at idle. Voltage drop over a long trailer charge line also leaves the bank undercharged. A DC-DC charger is strongly recommended because it limits current and delivers a proper lithium charge profile.
- How many lithium batteries do I need for my RV? Multiply your measured daily watt-hour consumption by the days of autonomy you want, then divide by the system voltage and the usable depth of discharge your battery maker supports. Also confirm that the combined BMS current rating can supply your inverter’s peak DC draw. That sometimes requires more batteries than capacity alone would suggest.
- What is the biggest disadvantage of lithium RV batteries? Higher upfront cost is the main drawback, followed by the restriction on charging below freezing. Lithium’s long cycle life and greater usable capacity often offset the price over the years you own the RV.
- Can lithium RV batteries be charged in freezing weather? Most LiFePO4 batteries should not be charged below 32°F (0°C) unless they have built-in low-temperature protection or internal heating. Discharging in the cold is generally allowed within the manufacturer’s stated range. Check your battery’s datasheet for both limits.
Conclusion
Upgrading an RV from lead-acid to lithium works best when you treat it as a system upgrade, not a battery swap. The essentials are:
- Size the bank from measured consumption, not guesses.
- Confirm every charging source can deliver a proper LiFePO4 profile.
- Protect the alternator with a DC-DC charger.
- Fuse the bank at the battery.
- Rely on a shunt monitor rather than voltage to know your state of charge.
The most common pitfalls are all avoidable:
- leaving a lead-acid-only converter in place
- skipping the main fuse
- using an undersized BMS for a large inverter
- mixing battery types
- charging in freezing temperatures
- forgetting about parasitic drains during storage
Avoid those and you get a lighter, longer-lasting house battery with more usable energy.
Start by gathering the datasheets for every component already in your RV and completing the load-measurement table in step 1. Then list which chargers need reprogramming or replacement. After installation, review your monitor’s data over a few trips; if your solar or alternator charging can’t keep up with the larger usable capacity, that data shows exactly where to expand next.
Spot an error or an outdated detail in this guide?
Report it